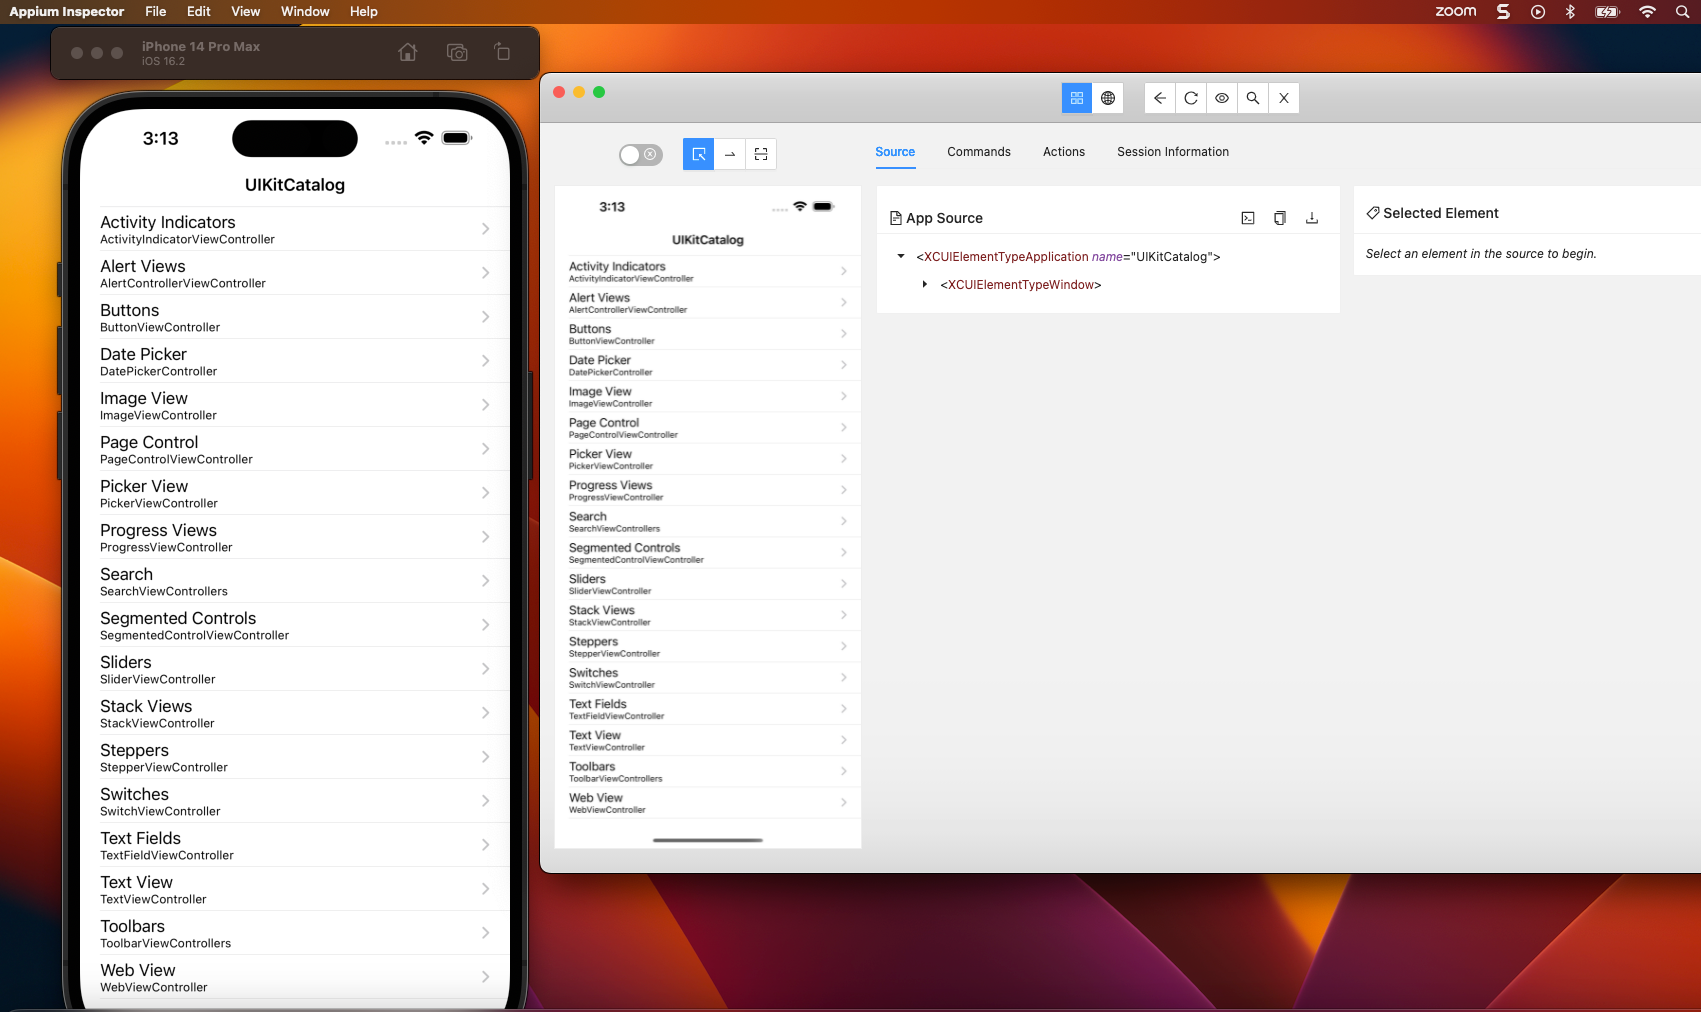
How to start a Driver session via Appium Inspector for inspecting Apps on iOS Simulator
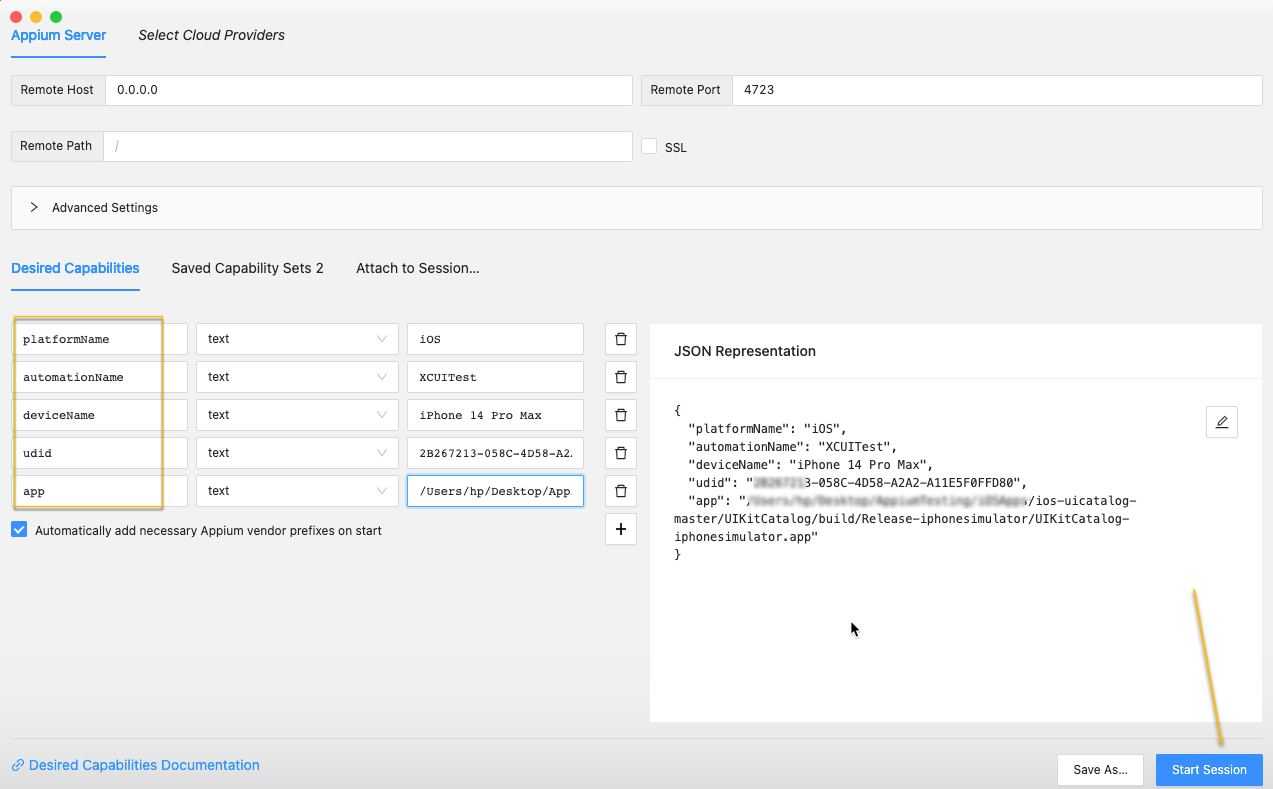
DesiredCapabilities for connecting Apps on iOS simulator with Appium server running on localhost

1. Learning Objectives
- Start driver session with iOS App on a simulator
2. Pre-requisites
Note:
If you have not done any installations and setup. Please refer to this Android setup or iOS setup
All references here, cli commands, and screenshots are from Mac OS X. It may not work as is,
windows specific post is work in progressiOS App used is https://github.com/appium/ios-uicatalog
2.1 Pre-requisites for starting driver session with simulator:
Appium Server
XCUITest driver
Xcode
Xcode command line tools
$> sudo xcode-select --install
$> sudo gem install xcpretty -> to beautify the logs
$> brew install Carthage -> dependency manager required by webdriver agent
Fetch the udid from command line
- $> xcrun simctl list
Build the .app file from https://github.com/appium/ios-uicatalog
Clone/Download the project
$> cd ./ios-uicatalog-master/UIKitCatalog -> go to 'UIKitCatalog' folder
$> npm install -> this will create .app file under ./UIKitCatalog/build/Release-iphonesimulator/UIKitCatalog-iphonesimulator.app
2.2 Installations required for real device
3. Start Driver Session on iPhone simulator
Step 3.1: Start Appium Server
Start the Appium server from the Terminal by executing 'appium' command
Note the Appium server IP and Port from the appium logs. Look for 'Appium REST http interface listener started on x.x.x.x:xxxx'
IP# 0.0.0.0 --> running locally on the machine
Port# 4723

Step 3.2: Build the app
a. Down the https://github.com/appium/ios-uicatalog project
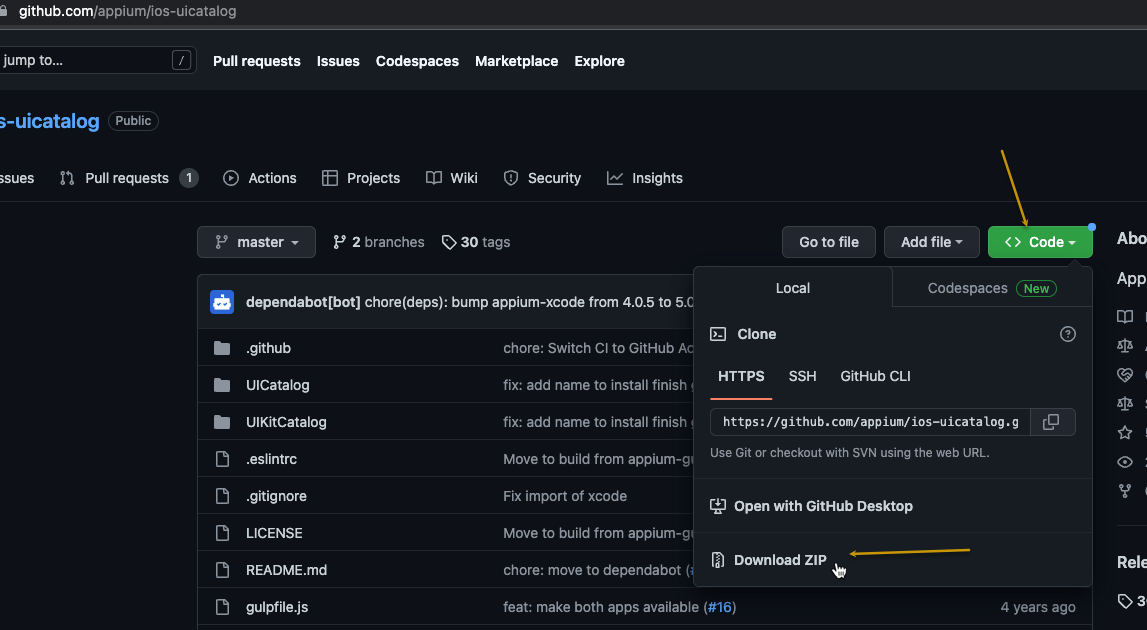
b. extract the downloaded zip and from the Terminal, execute the following command
$> npm install
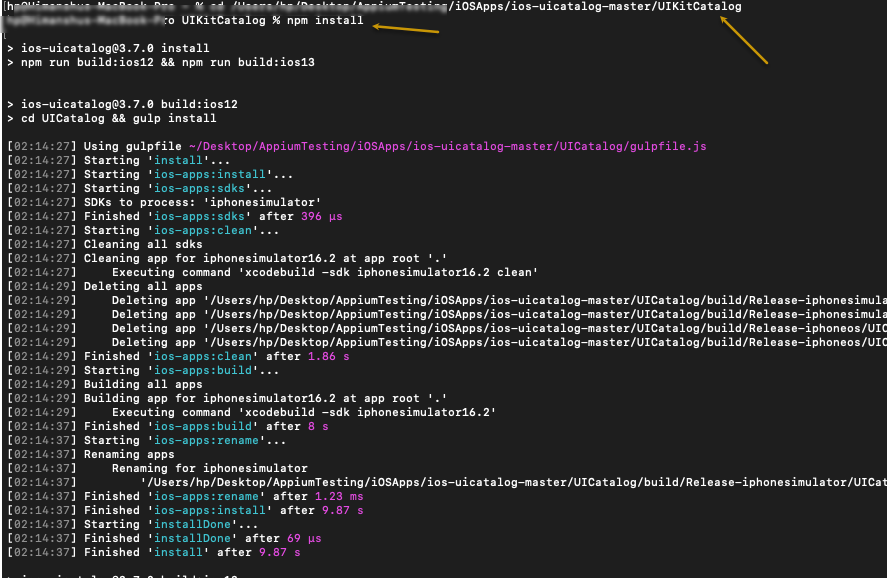
c. This will create the .app file which we will need when starting driver session via Appium Inspector

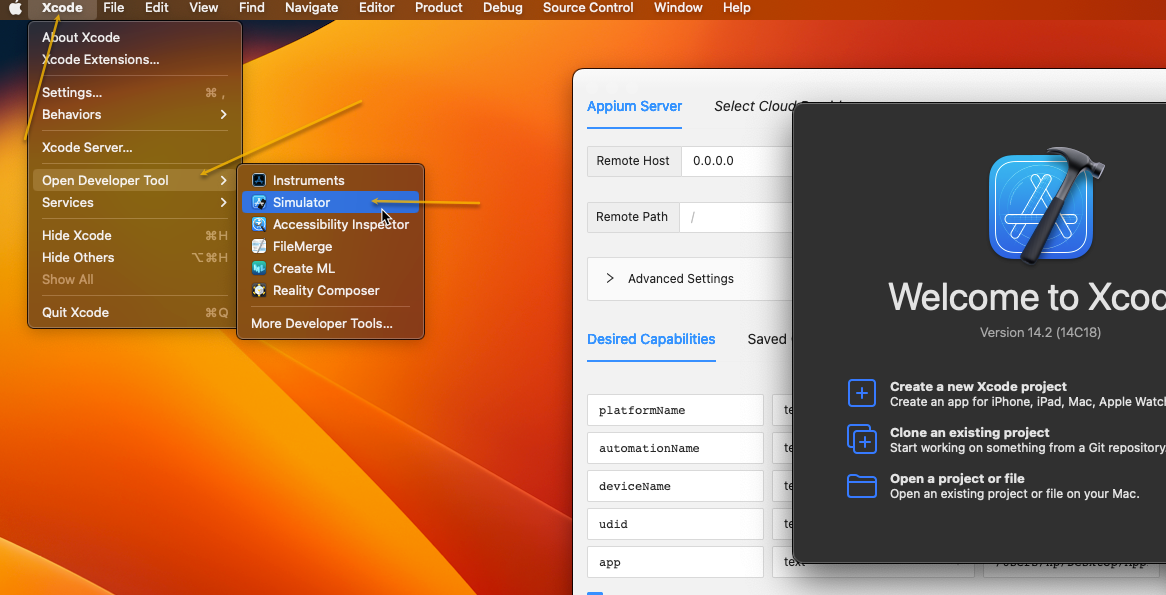
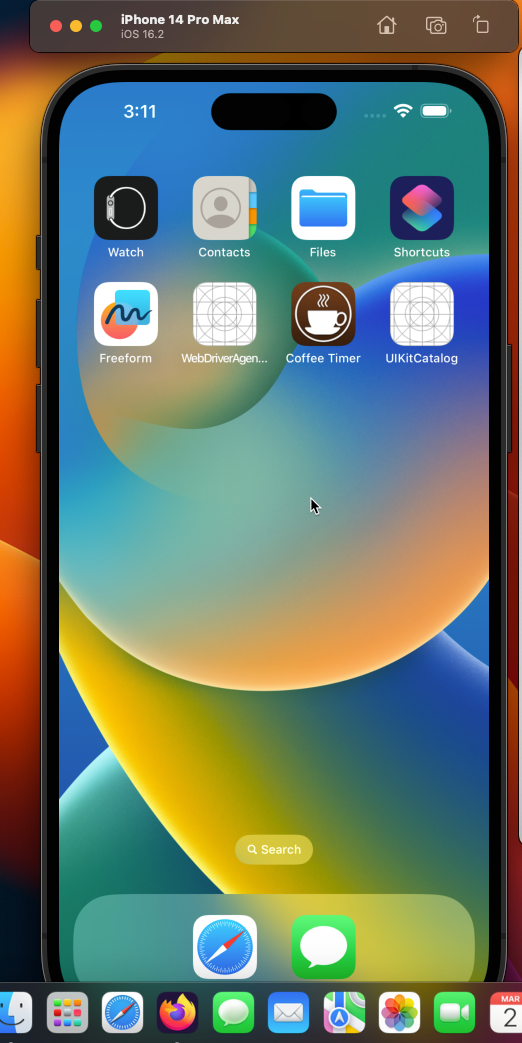
Step 3.4: Launch the Simulator via Xcode
Step 3.3: Start session after adding DesiredCapability