Postman setup on macOS - a beginner's guide
Setup Postman on macOS and run the first API call

1. Intro
Postman has grown to be an extremely popular tool among Backend devs and a powerful platform for building and using APIs. This is not just a tool for development, it is also an extremely powerful tool for functional testing. Hence it is a no-brainer that if you are planning to get into API testing you should pick up the knowledge on the Postman, if not already done.
And the first step is always about "Setting up" your machine to be able to explore & learn any tool
2. Who this is for
Someone relatively new on MacOS and trying to setup Postman
Someone who is keen on starting learning on Postman and looking for actionable information to get the setup going without going too much into academics
Someone who understands Software Testing but never in the context of Postman / API Testing and wondering where to start
3. Learning Objects
how to setup Postman on macOS
how to read & interpret a curl GET command and migrate it to Postman
how to setup Postman on Web App
how to read & interpret a curl POST command to migrate it to Postman
practice problems
4. Important points to note
The postman download link used at the time of writing this post is here
To demonstrate the completion of the setup, we are going to make GET and POST call(s):
GET Call:
 curl -X 'GET' \
   'https://petstore.swagger.io/v2/pet/findByStatus?status=available' \
   -H 'accept: application/json'
POST Call:
 curl -X 'POST' \
   'https://petstore.swagger.io/v2/pet' \
   -H 'accept: application/json' \
   -H 'Content-Type: application/json' \
   -d '{
   "id": 100101,
   "category": {
     "id": 5,
     "name": "Lahsa"
   },
   "name": "Poppy",
   "status": "available"
 }'
5. Postman App Setup (macOS)
Step 1.1 - Download
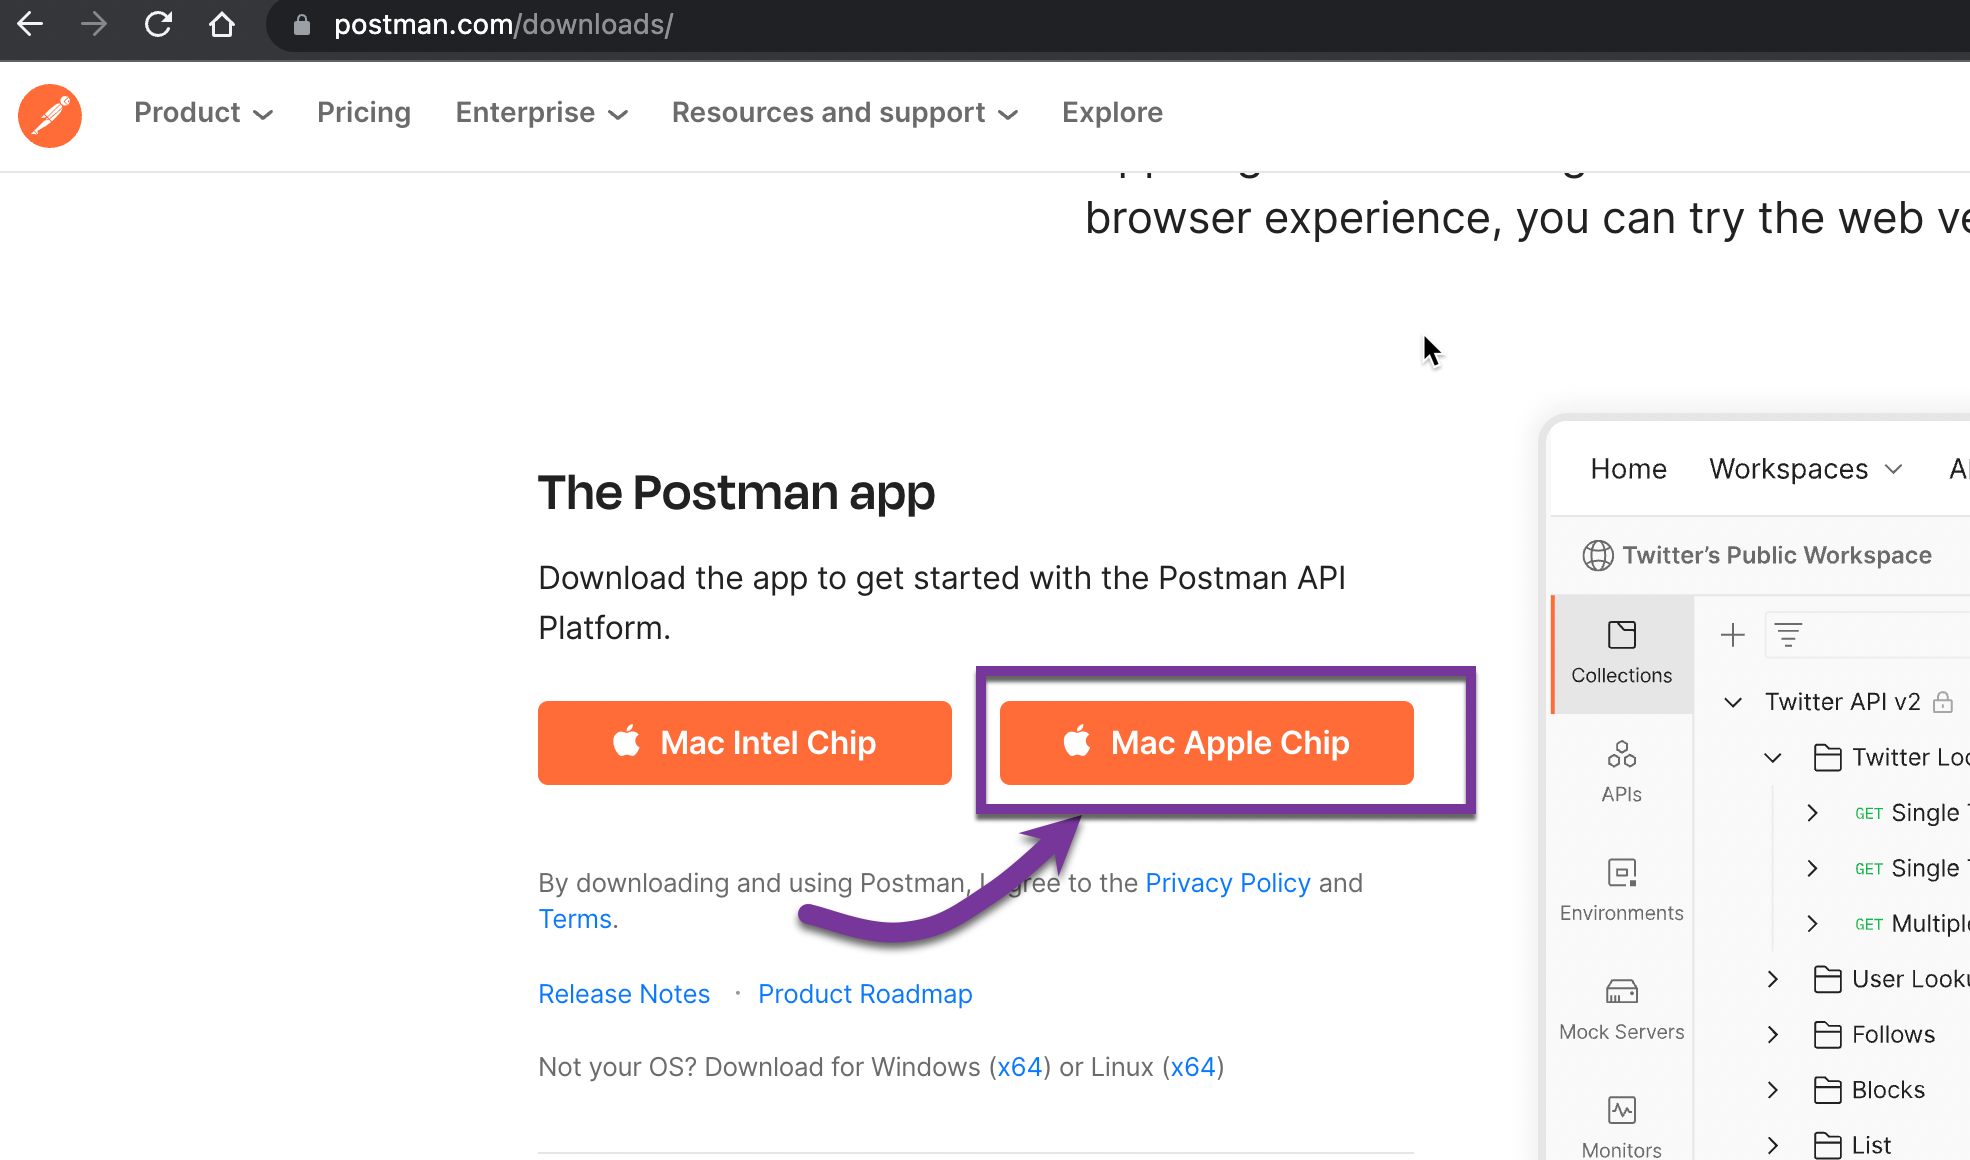
From the downloads pages, choose the right version to download based on your OS.
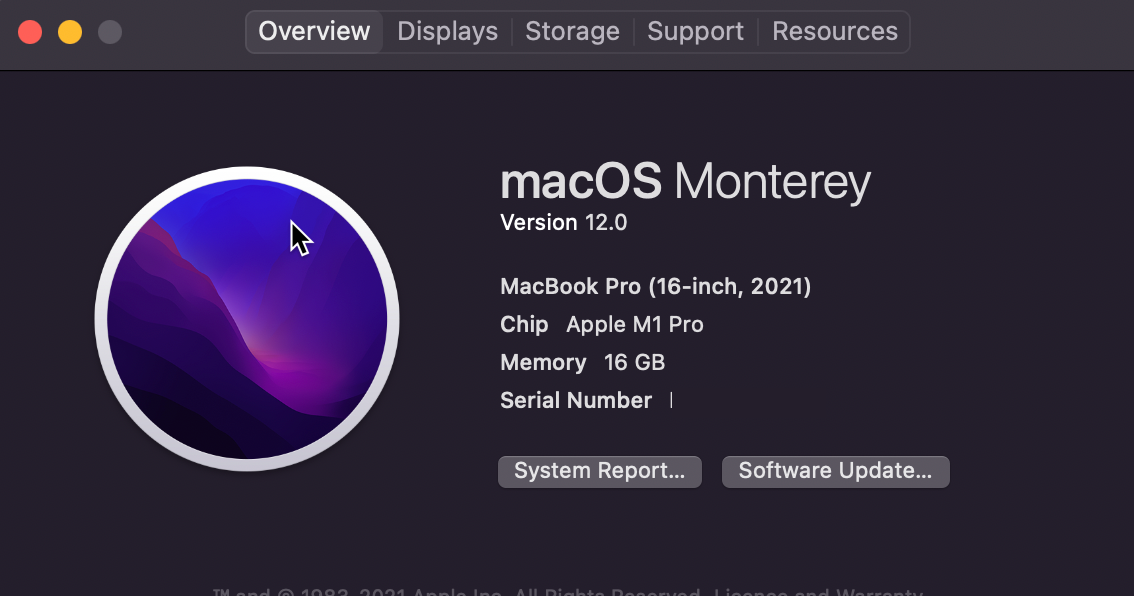
a. Check the version you want to download. In my case, I am using "Mac Apple Chip", hence I am going for this version
Note:
If you are using macOS but are unsure of which version refer to this page
For Windows, refer to this page
b. you can check the download progress at the bottom left of your browser:

Step 1.2 Install & Launch App
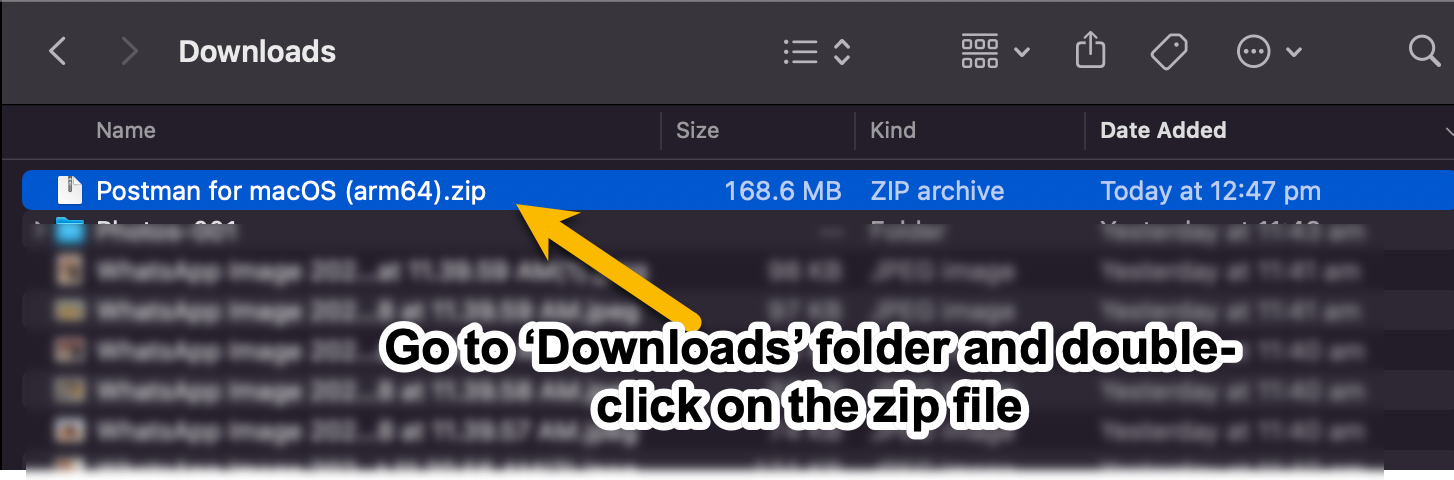
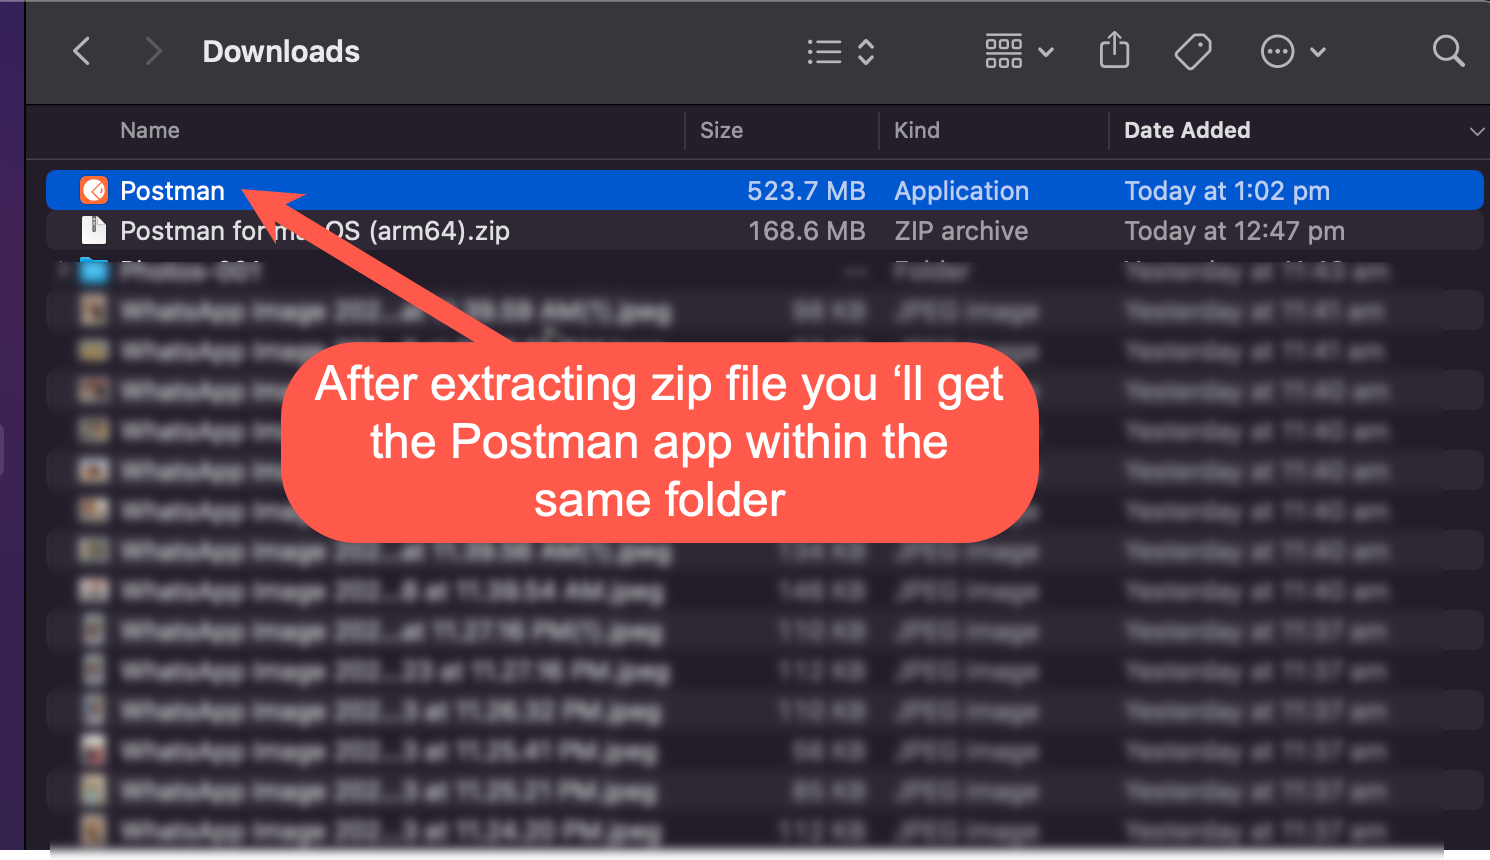
a. After the download is complete, go to Downloads and double-click on the zip file
b. Double-clicking the zip file will extract the Postman app we want to use within the 'Downloads' folder, like this:
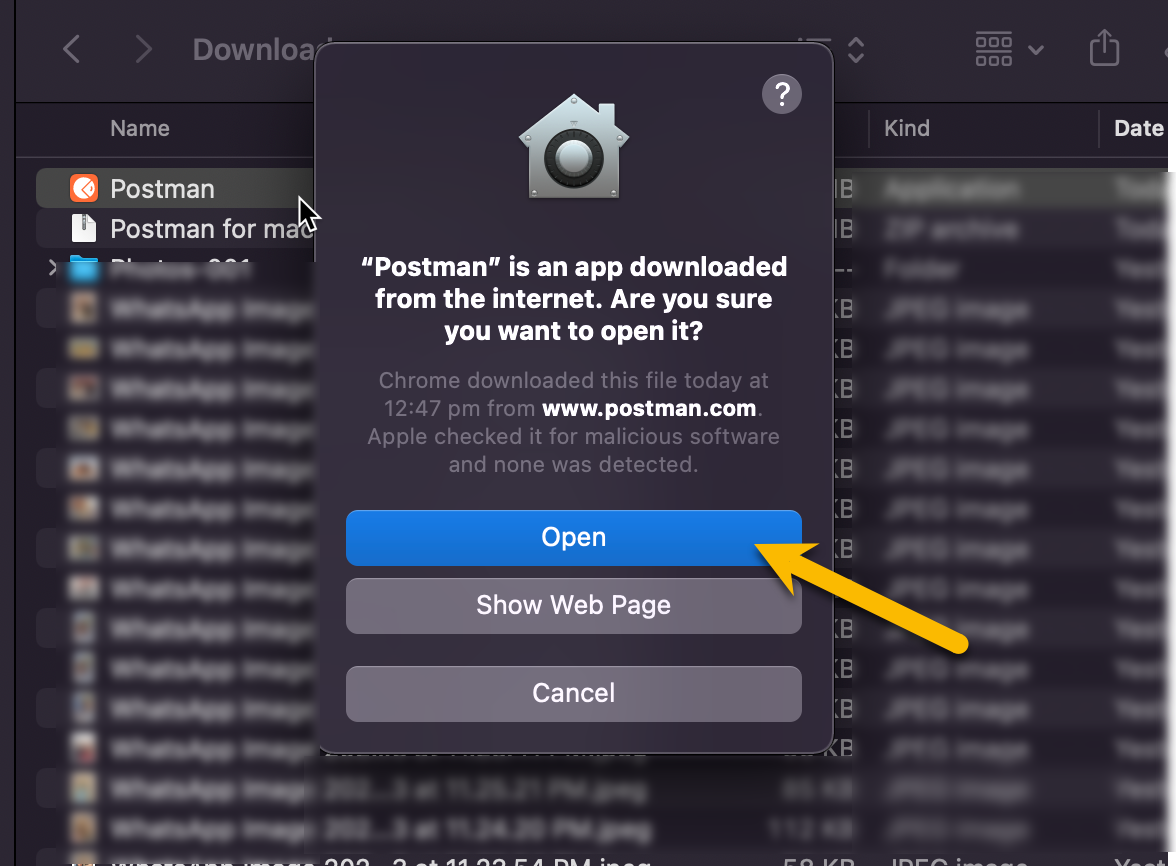
c. Double-click on the extracted Postman app, then when you get the pop-up, click Open
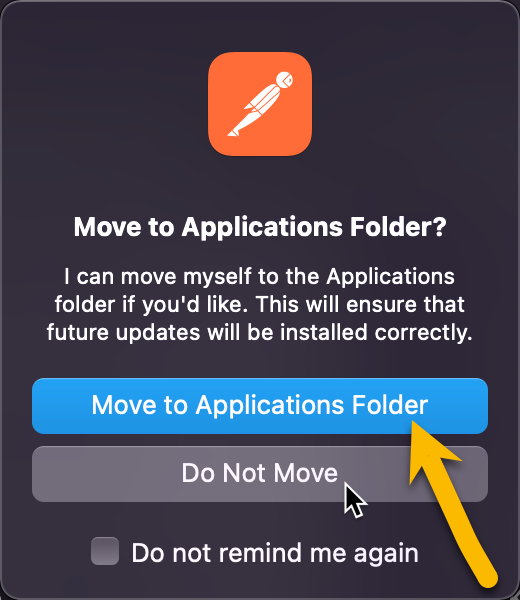
d. then "Move to Applications Folder"
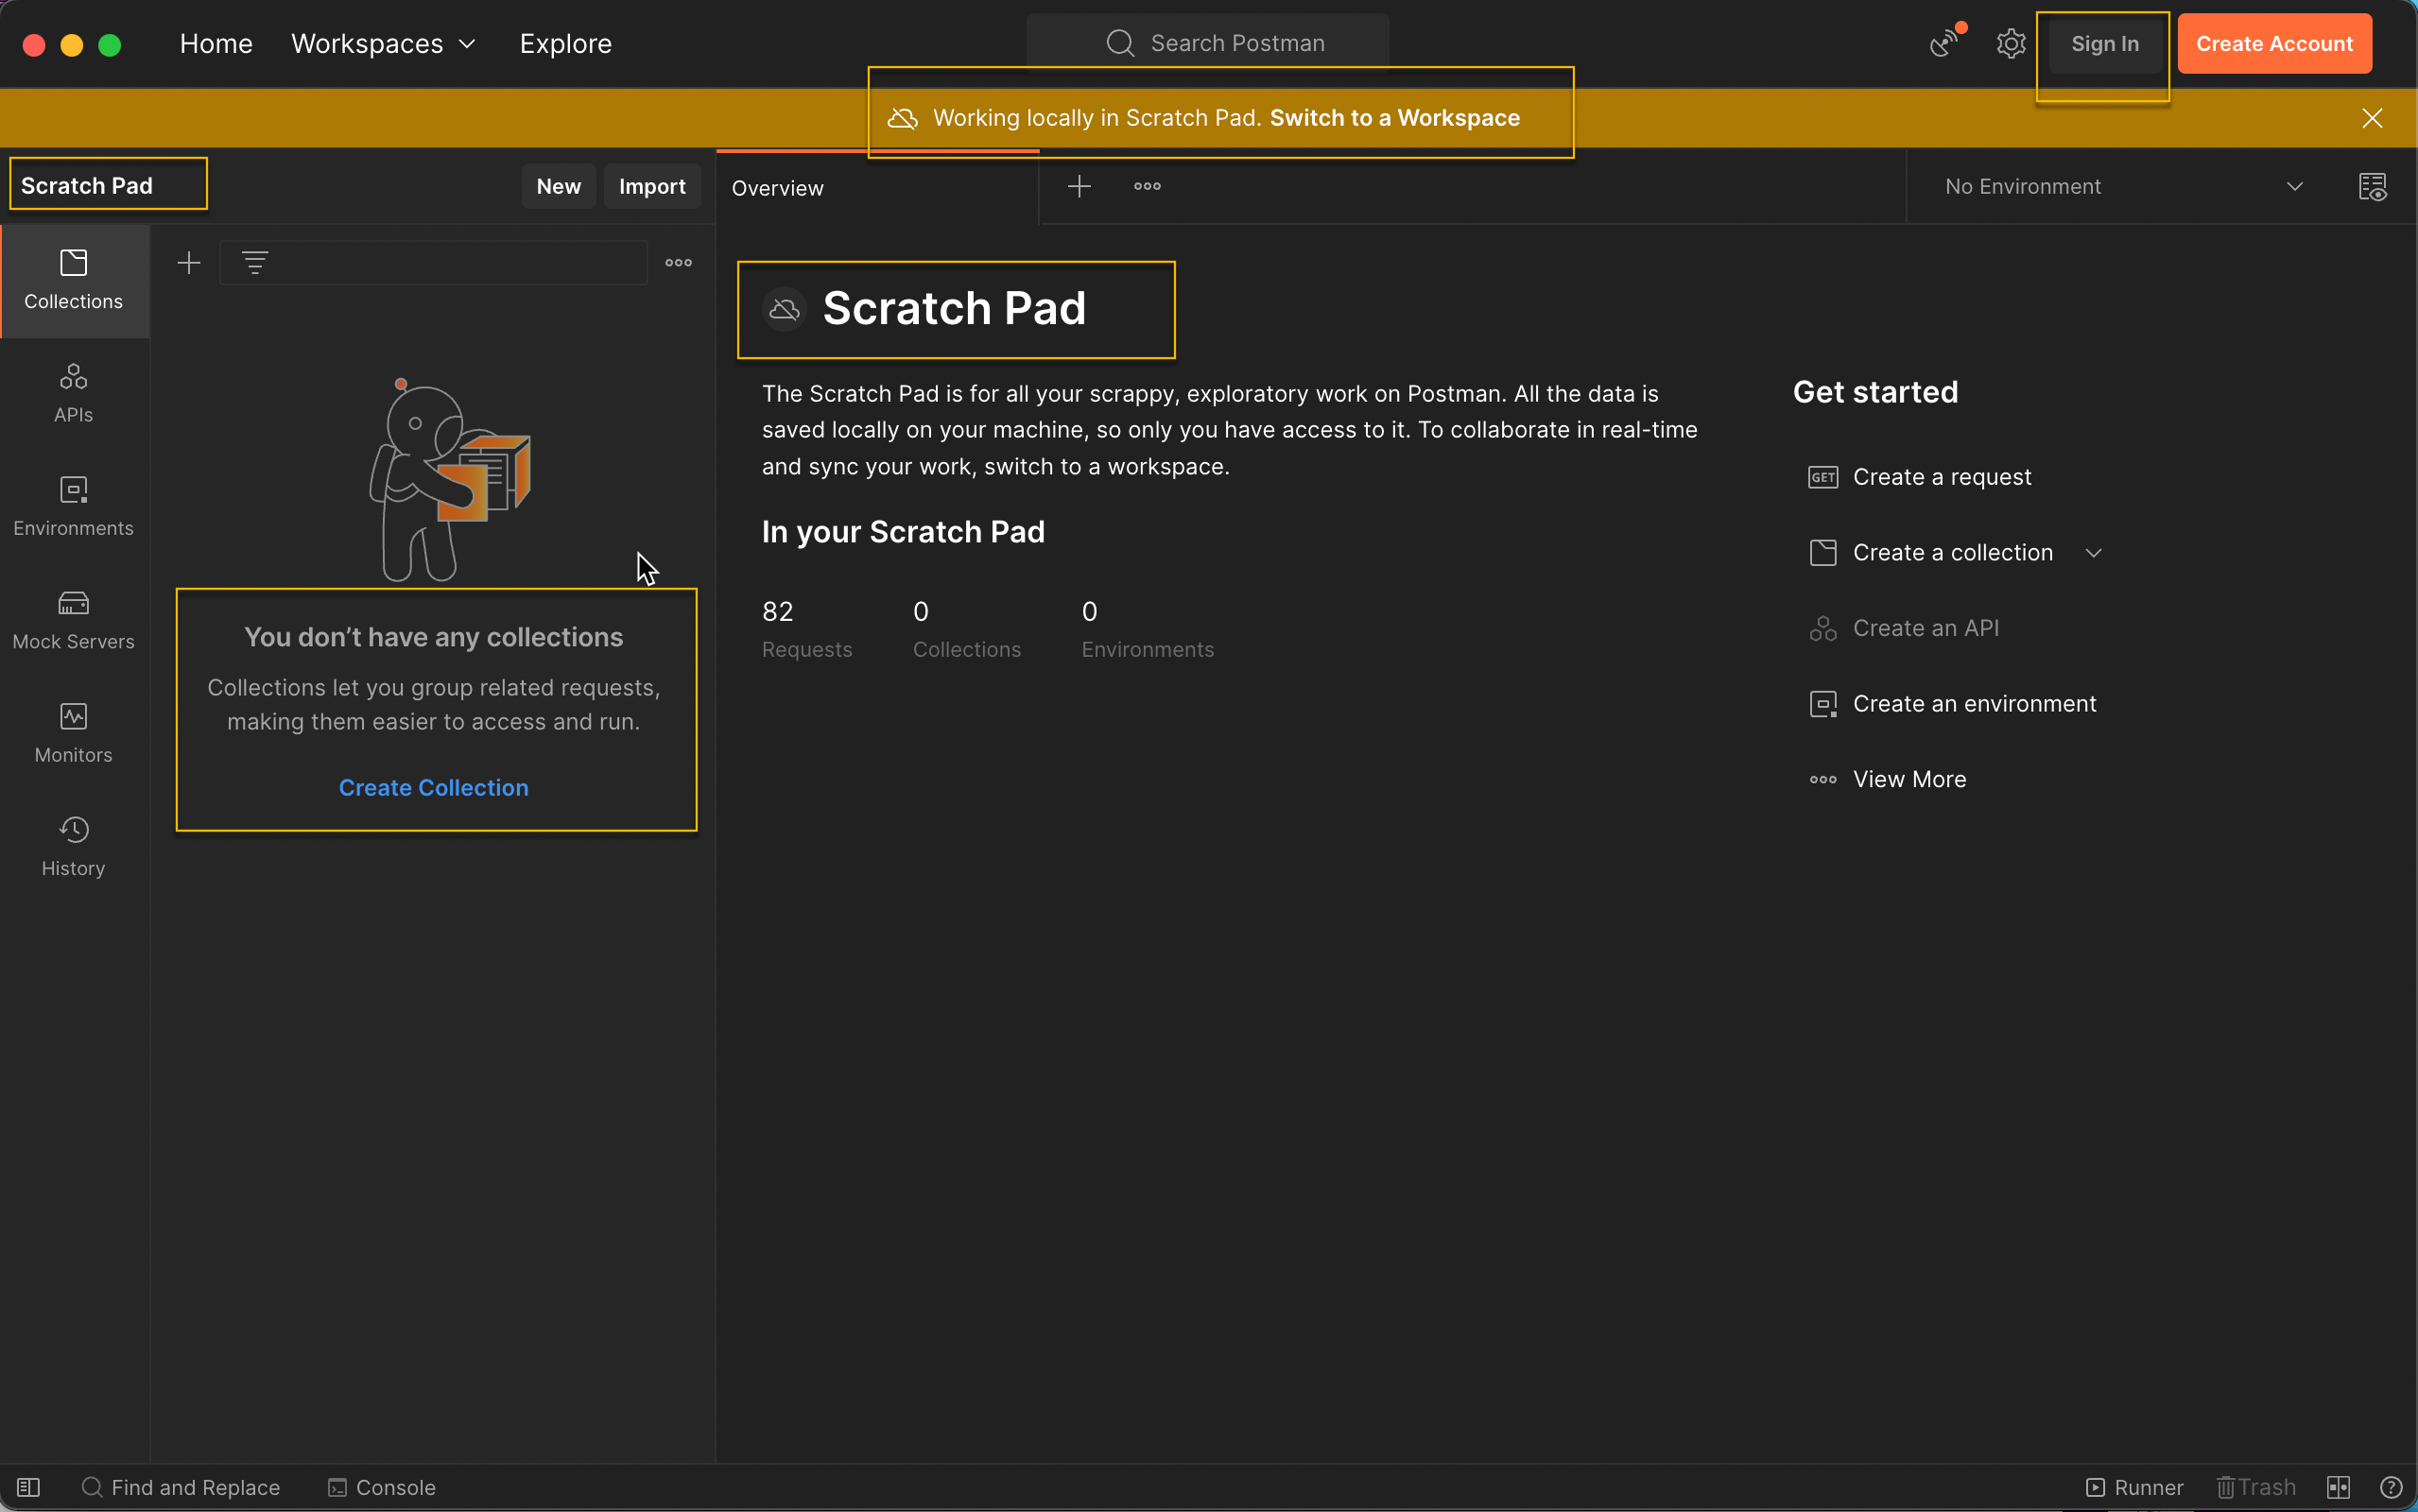
d. After you have moved it to Applications Folder in above Step, Postman app would be launched automatically and you would get this view
e. [Tip] Closing Postman App on Mac :
There are going to be times when your Postman app gets stuck/frozen or for some other reason you would feel re-launching the App might solve an issue.
Please note that clicking the red cross at the top left corner of the App would just minimize it
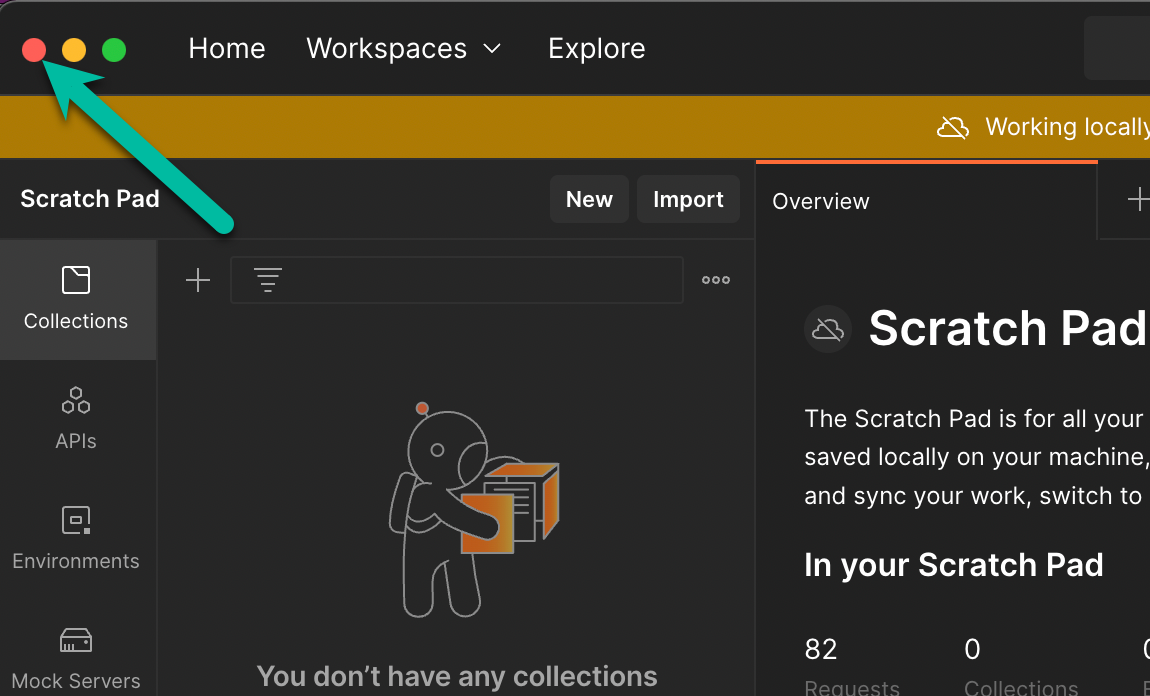
and to close it completely, you need to "Quit" as shown below

f. [Tip] Re-launching Postman on Mac :
If you want to relaunch it after restarting your machine, you can either go to the "Applications" folder
ORyou can search for it on Mac by pressing
command + space barand select from the results as follows: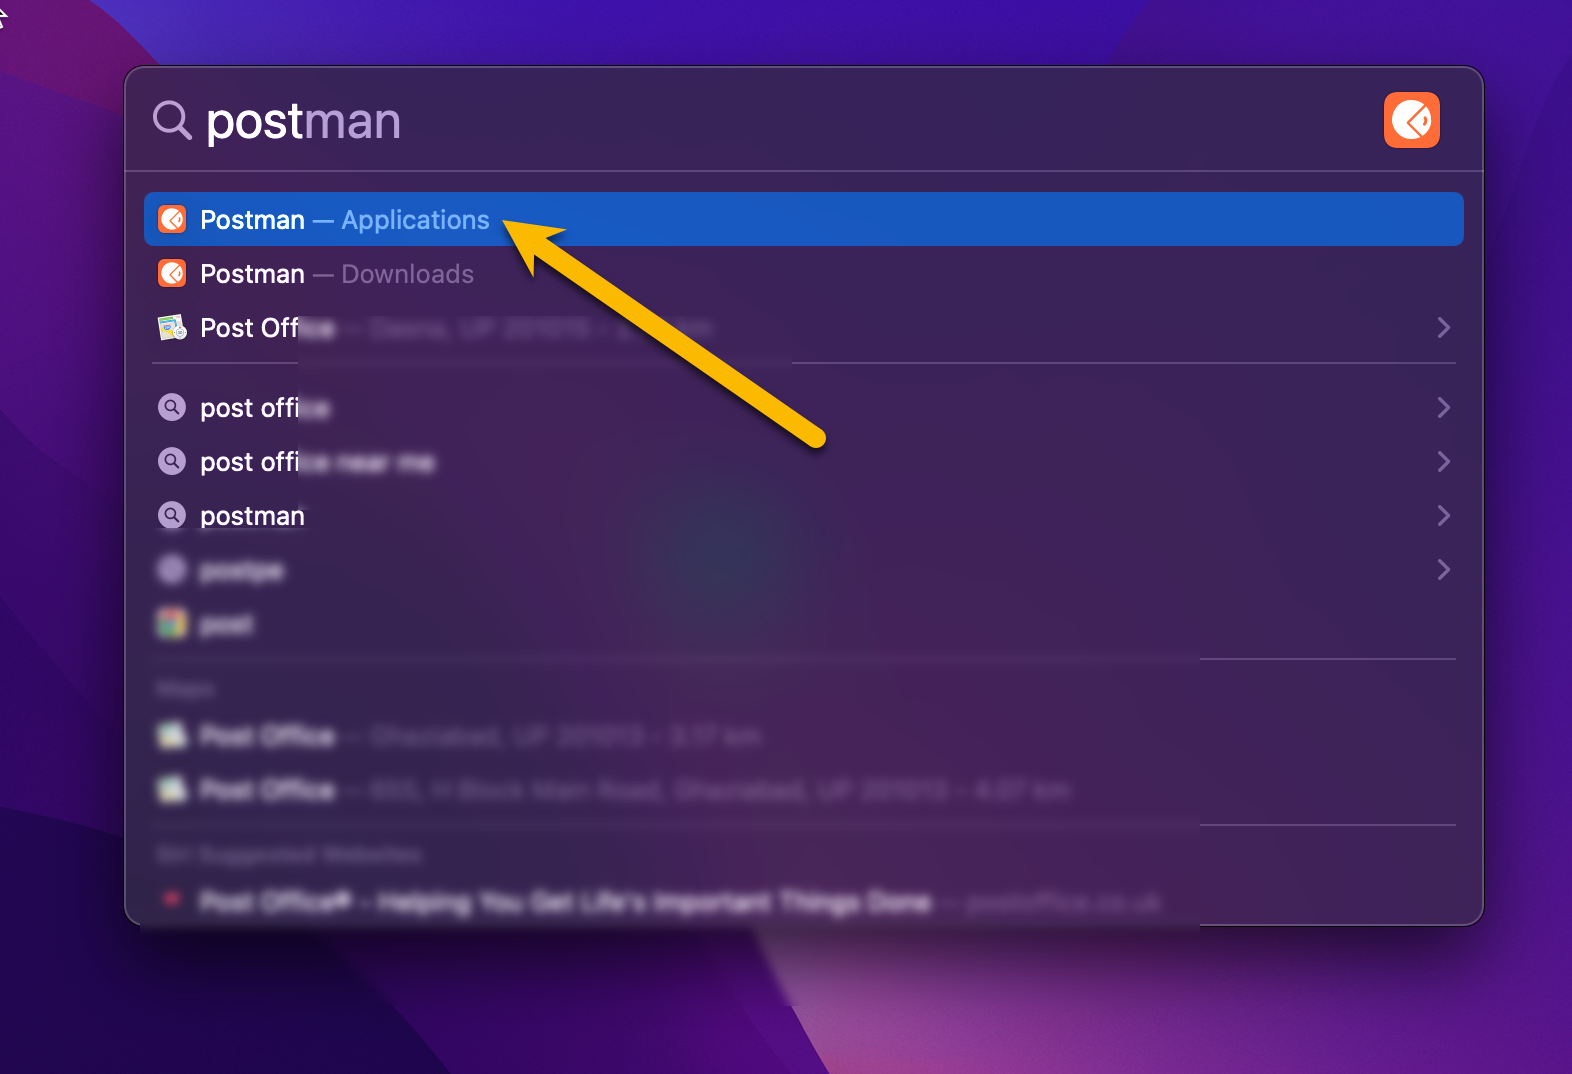
Step 1.3 Reading curl GET command & Postman 101
1.3.1 Create an Account with Postman
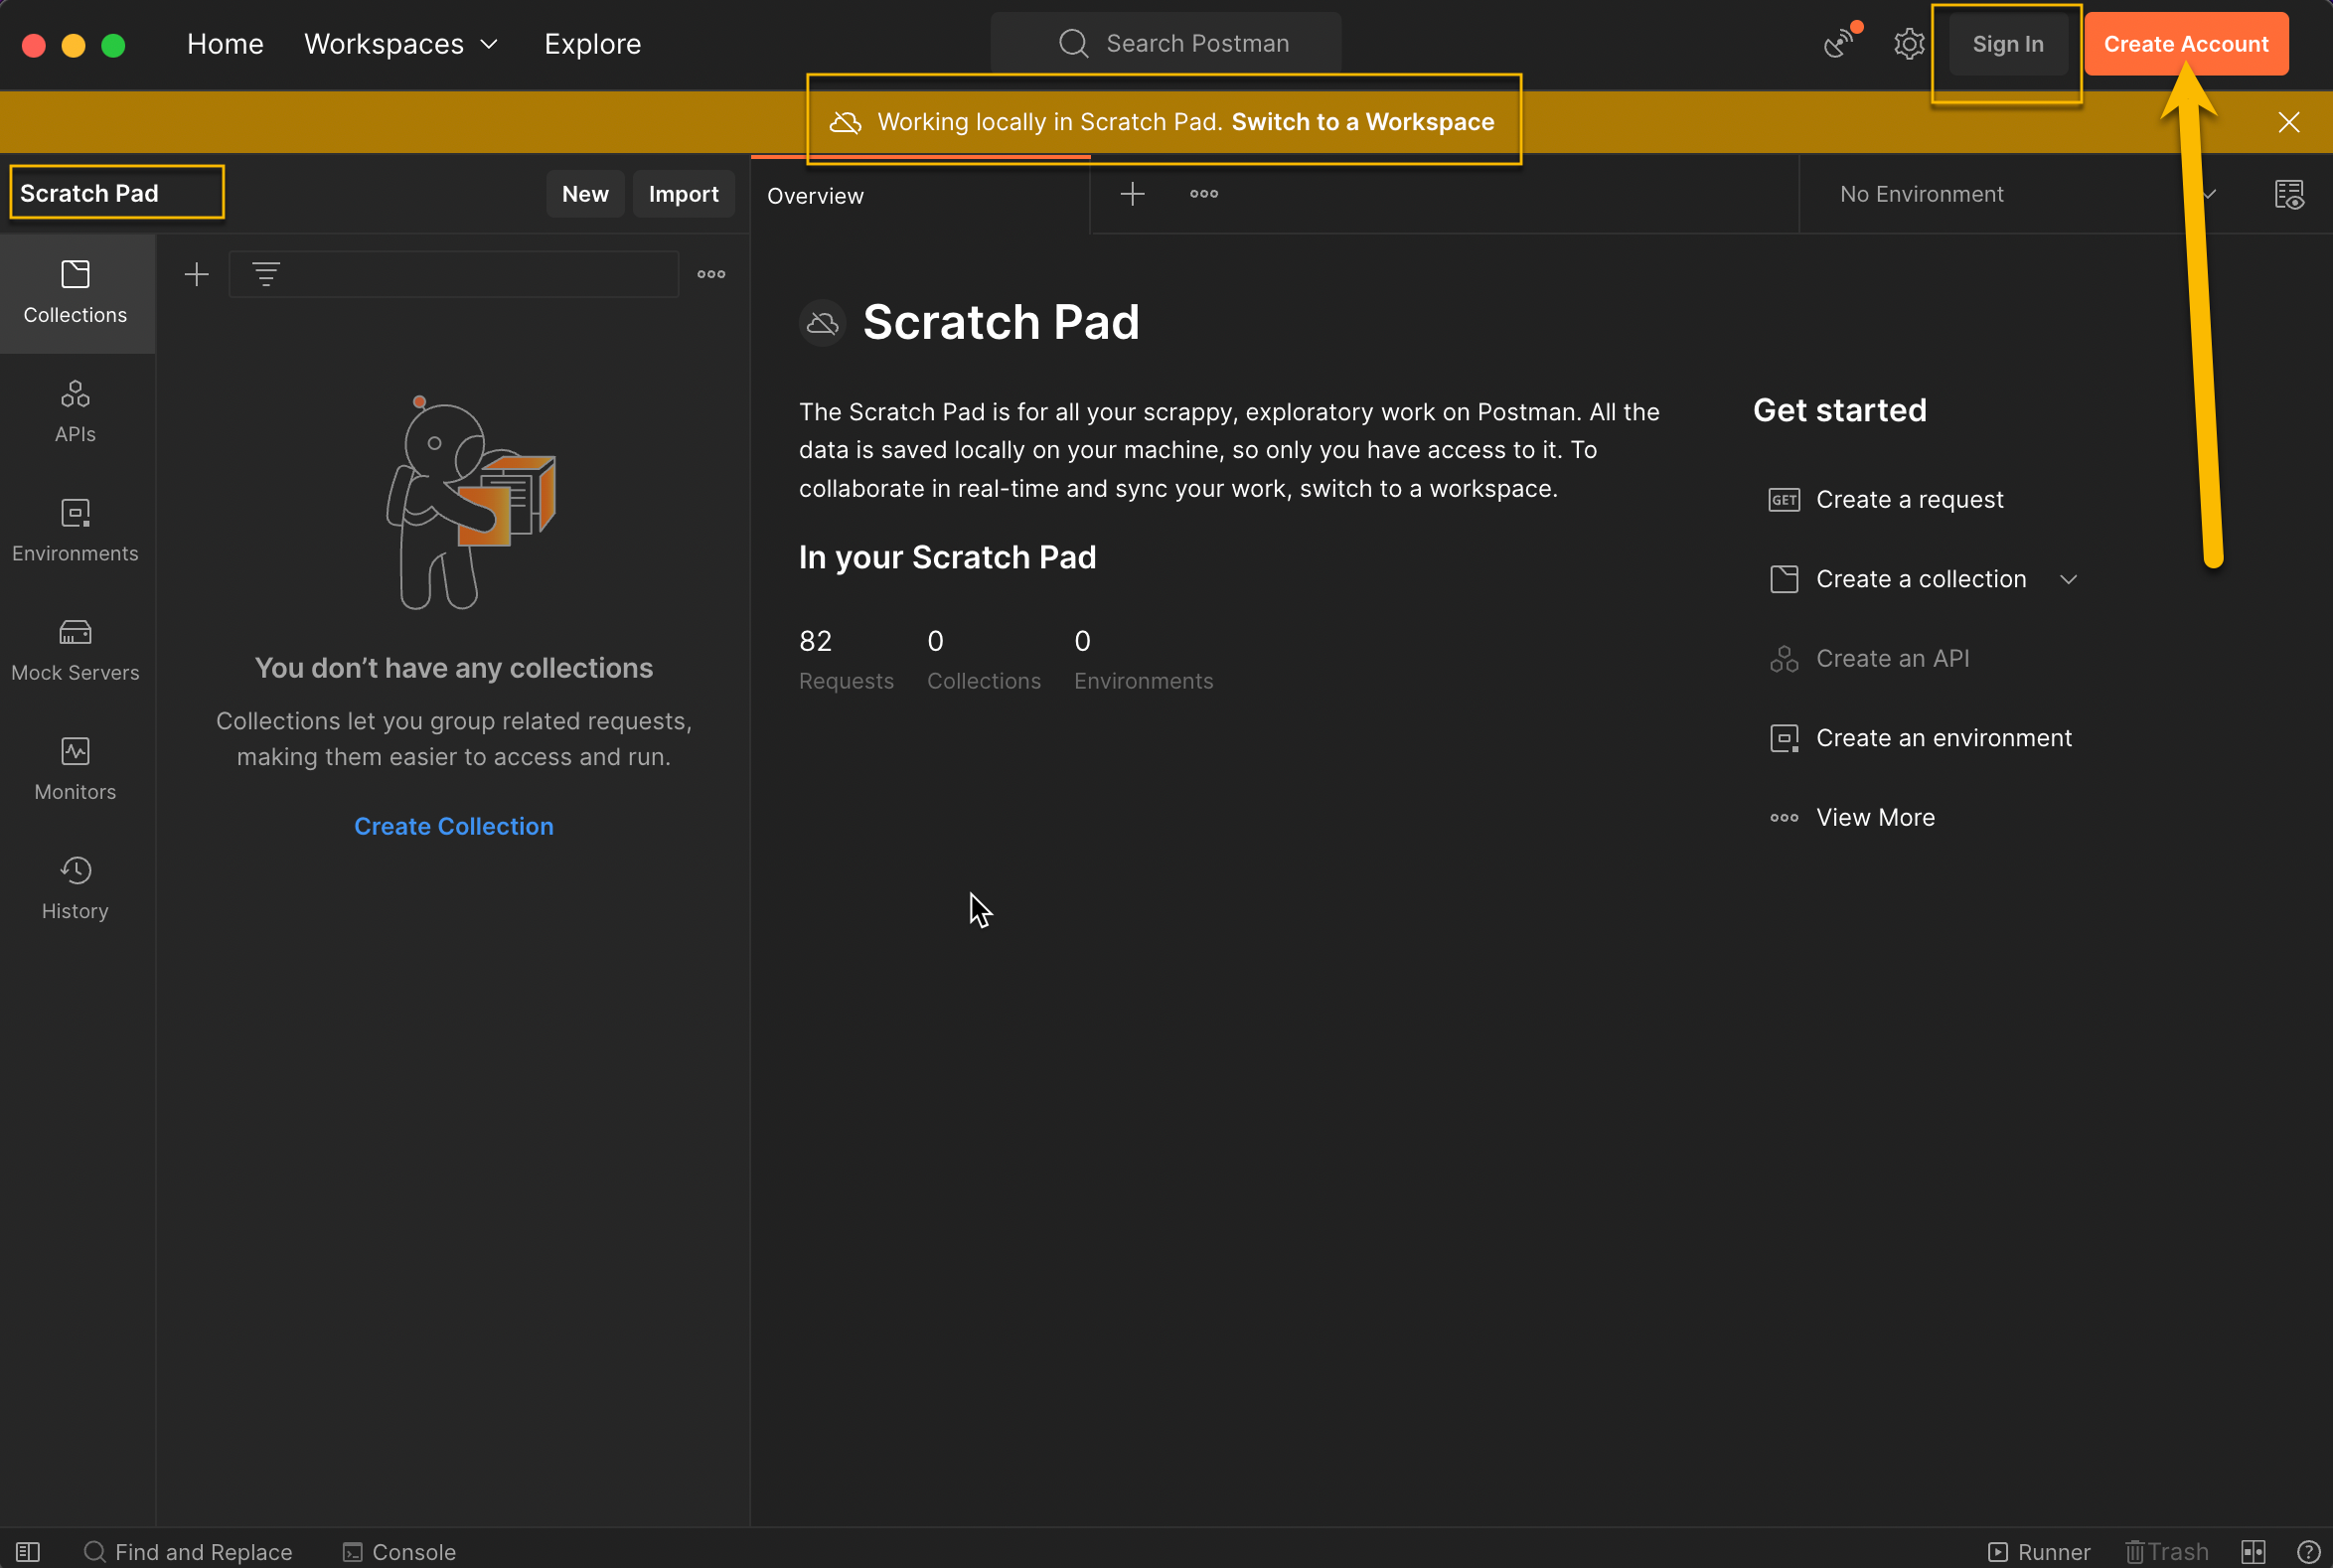
By default, you are not logged in, and you would see 'Scratch Pad'
So it is recommended to 'Create Account' to start with so that you can switch between App and Web versions seamlessly across devices without worrying about losing your saved work
- you would be redirected to the 'Create Postman Account' web page to the default browser
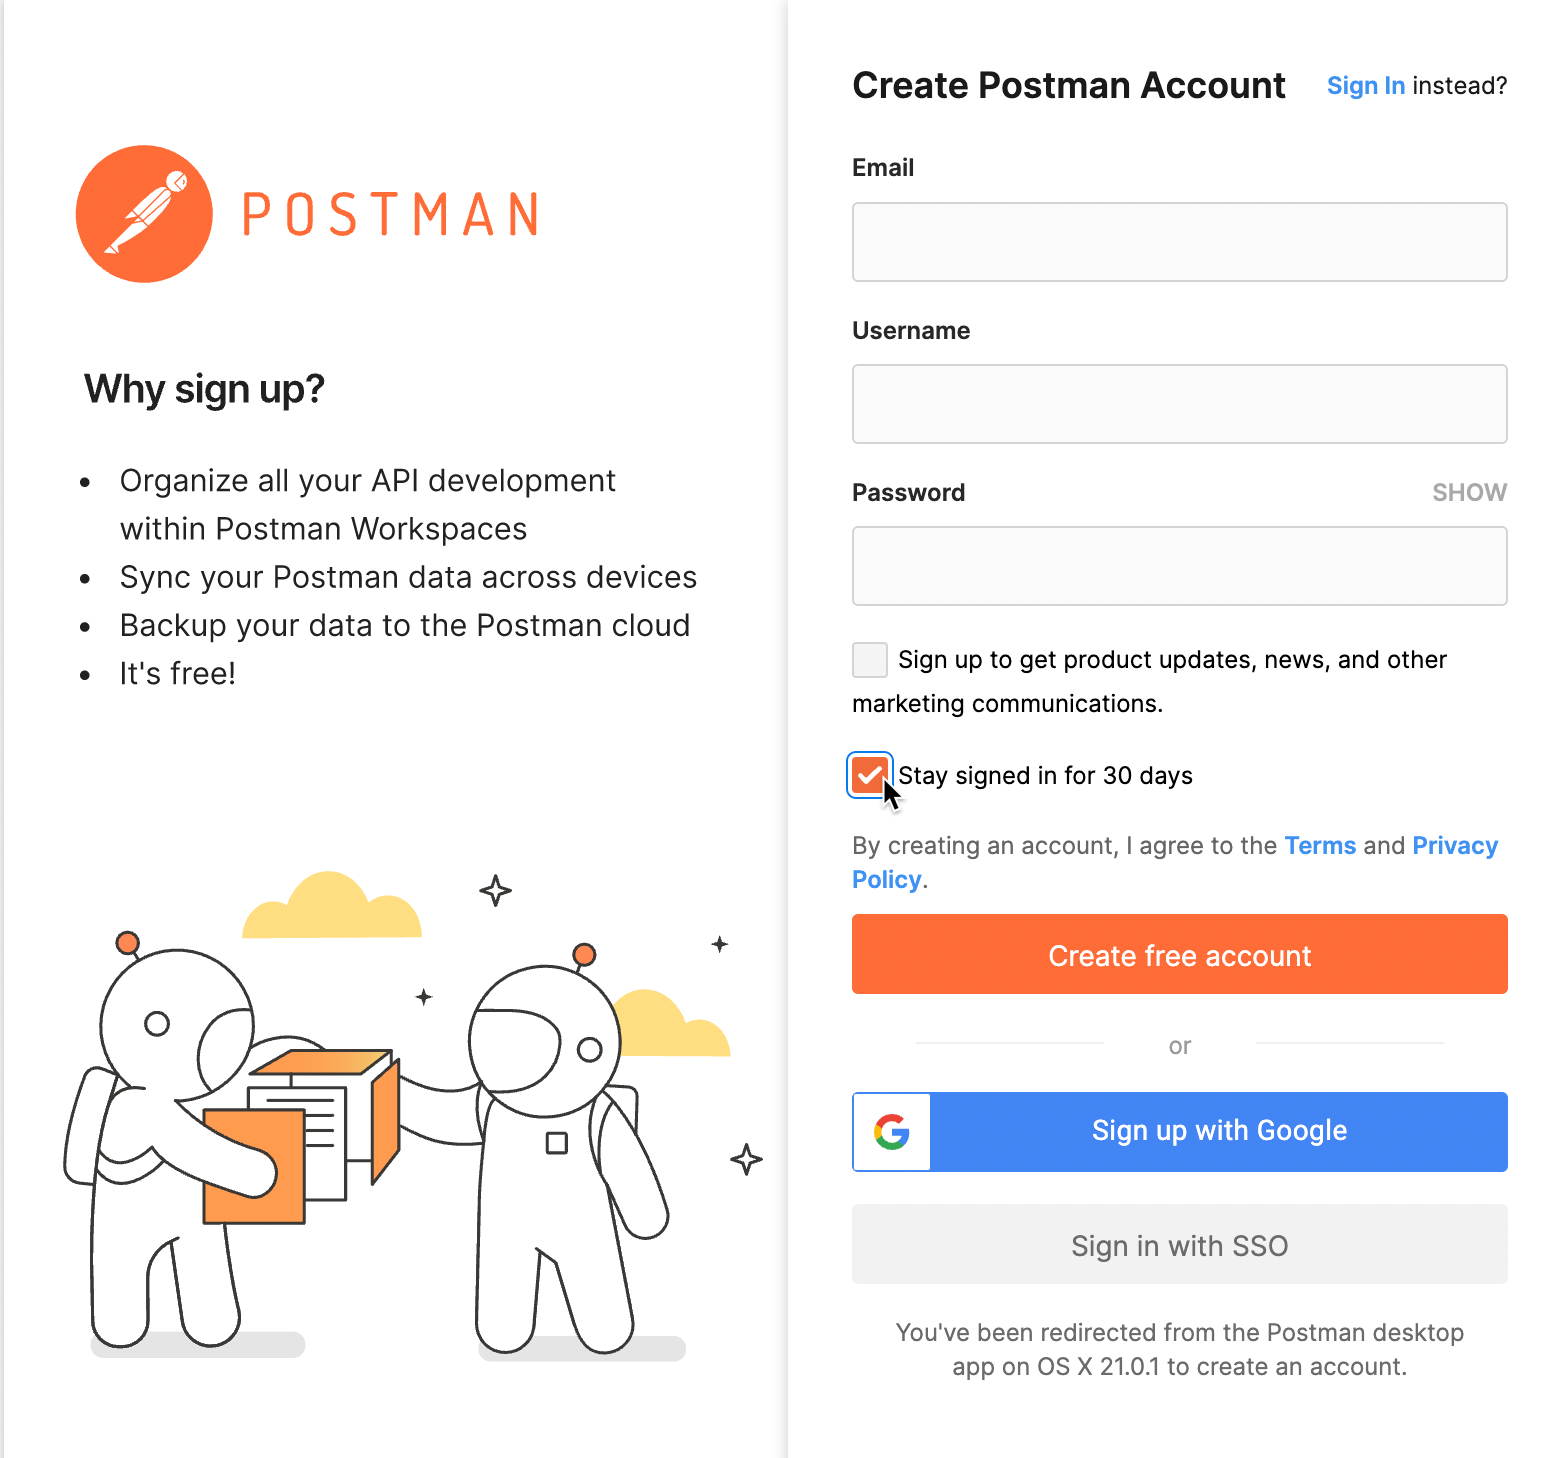
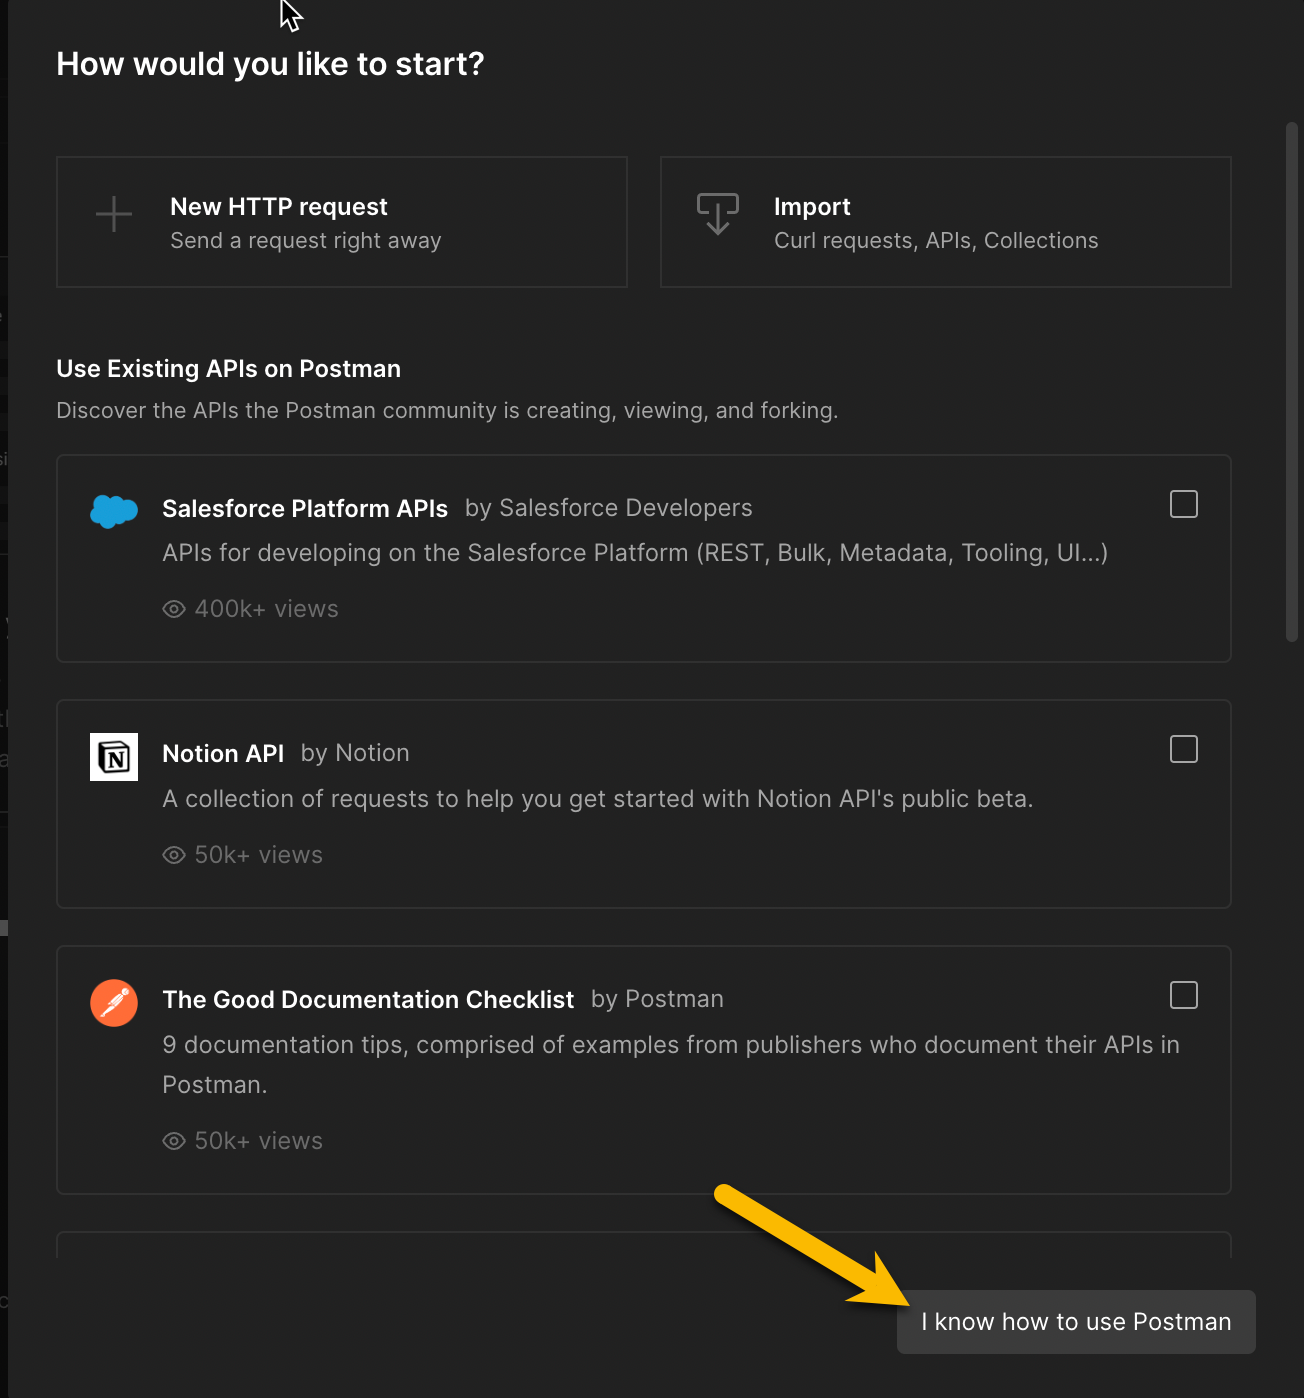
- and after signing up successfully, you would be redirected back to Postman App and just follow along with the basic questionnaire, select 'I know how to use Postman'
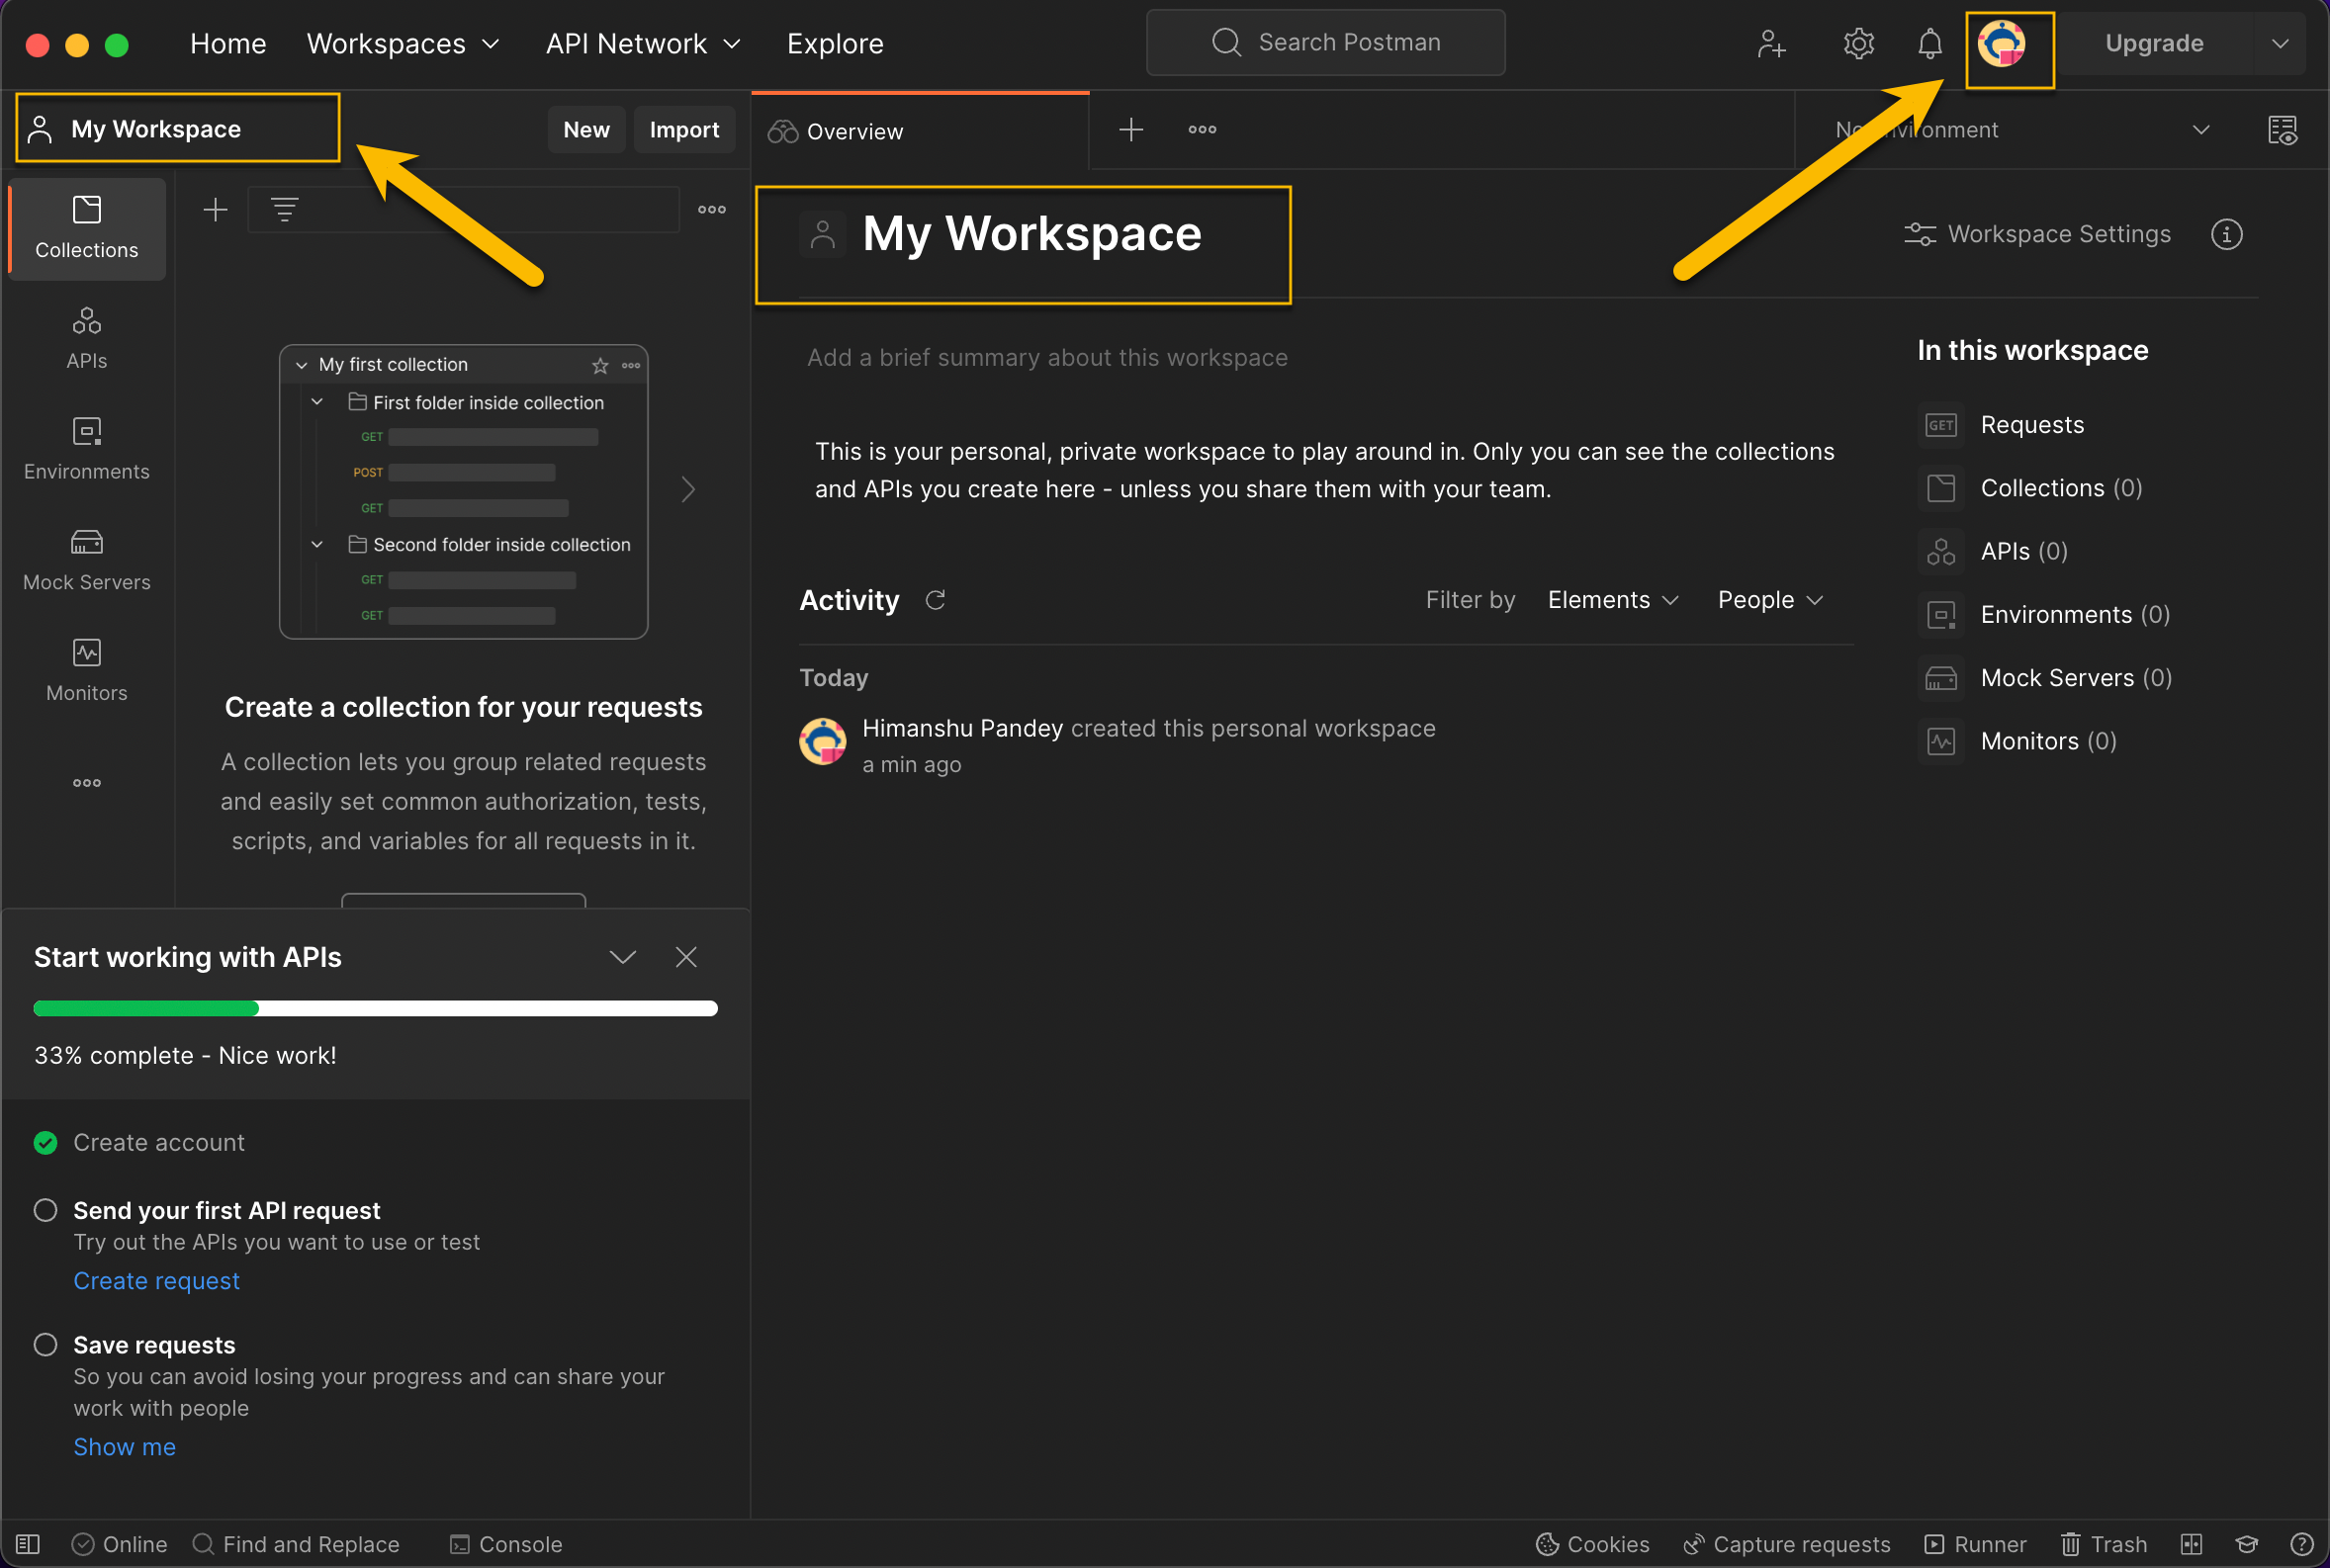
- then you would be redirected back to Postman App as a logged-in user and now instead of 'Scratch Pad' you would see 'My Workspace'
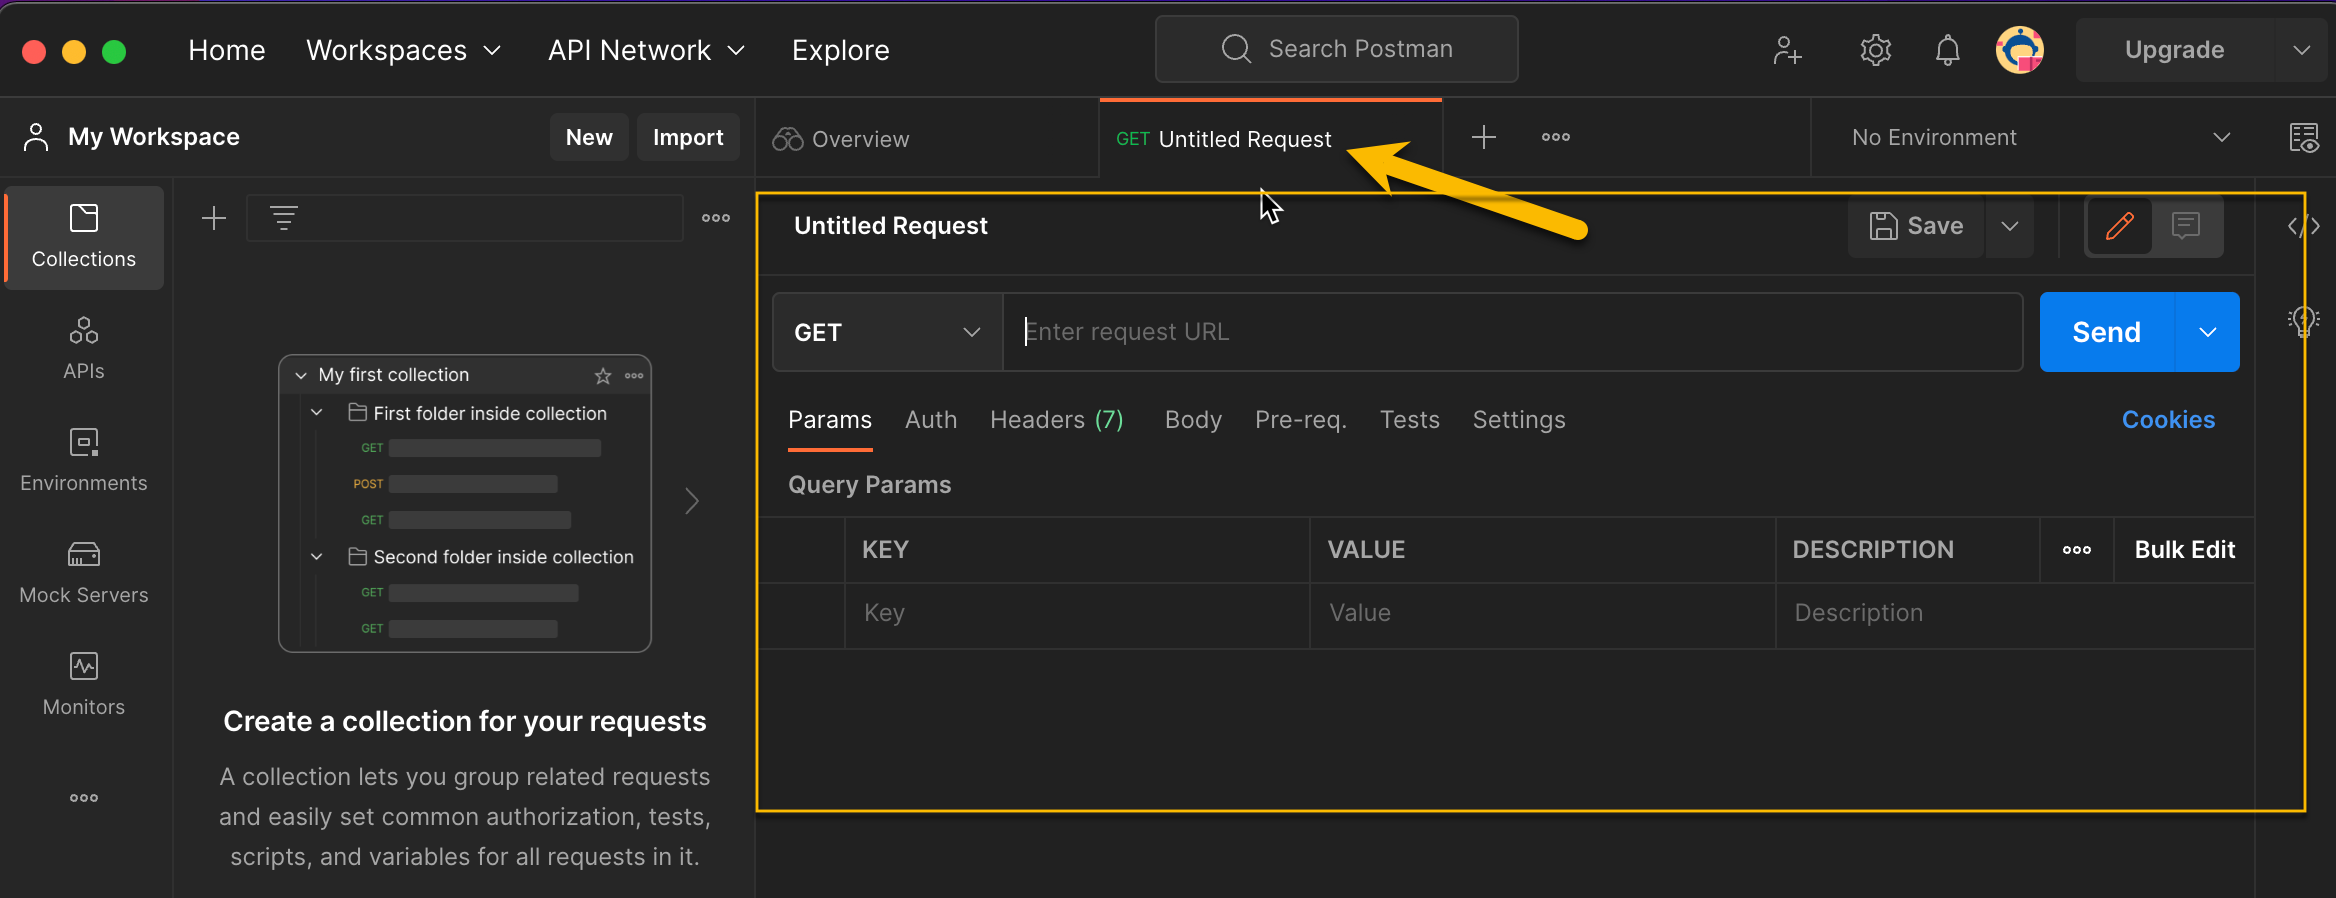
1.3.2 How to get the HTTP Request window
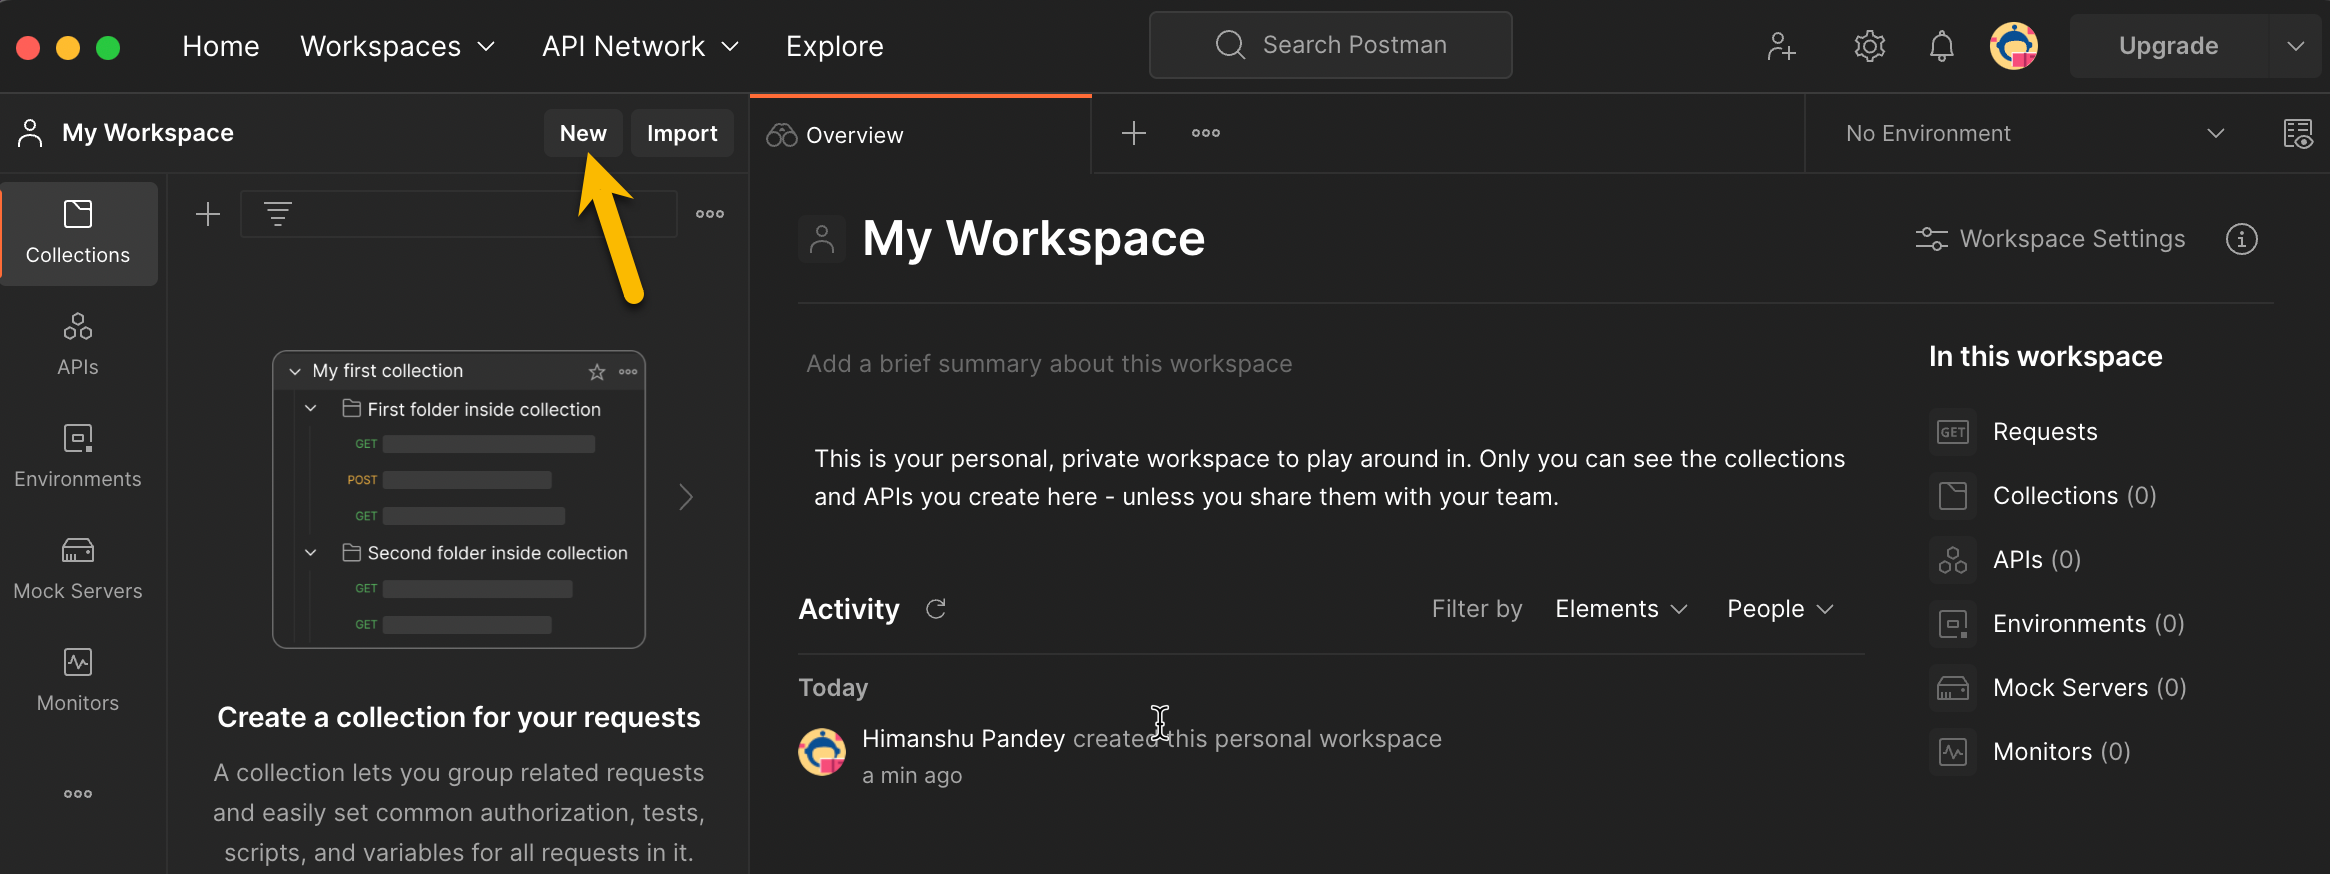
(i) you need to click on "New" from the left panel
(ii) and from the pop up select "HTTP Request"
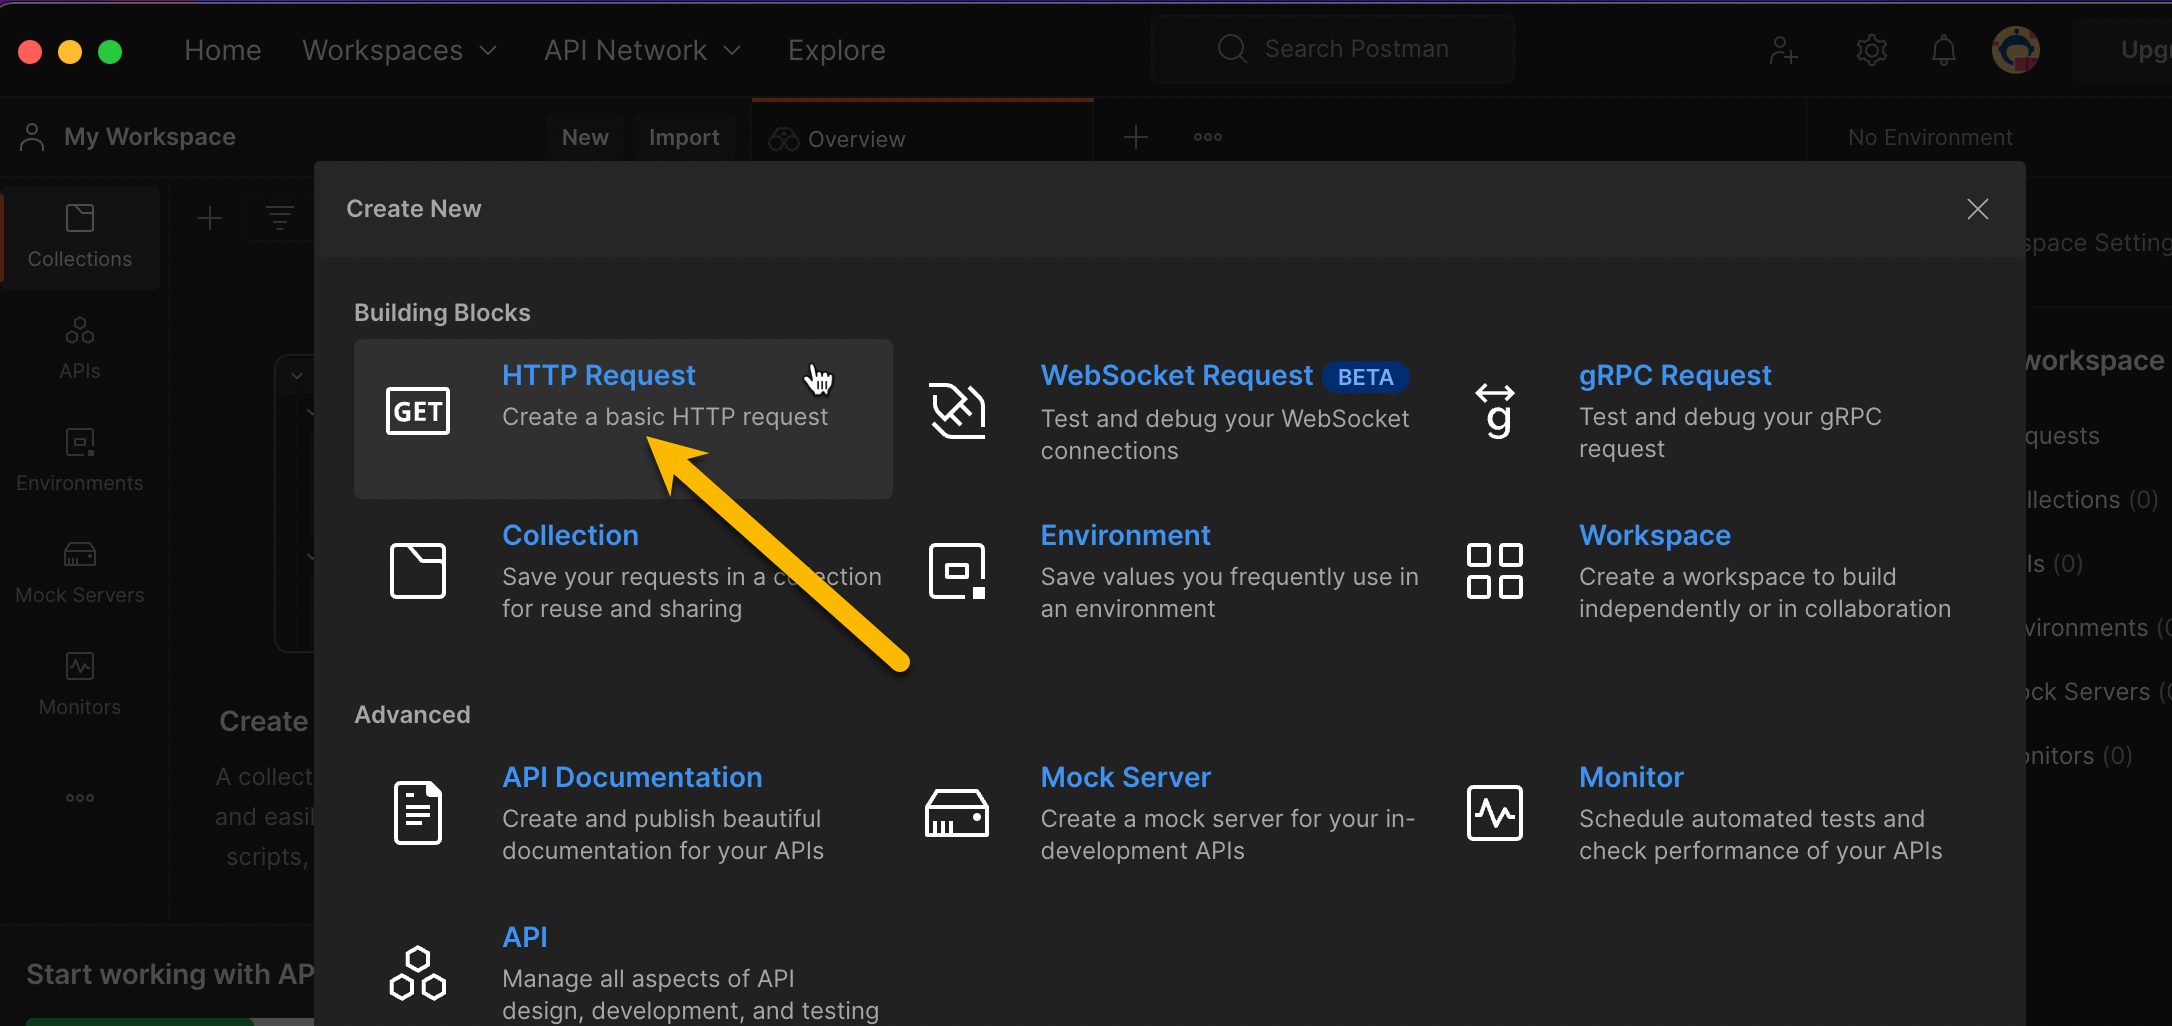
(iii) this would give you the request window, that's going to be your primary playground
1.3.3 Understanding the curl GET command to map it with Postman
curl -X 'GET' \
  'https://petstore.swagger.io/v2/pet/findByStatus?status=available' \
  -H 'accept: application/json'
a.curl -X -> curl short of Client URL,is a CLI tool used that enables data transfer over network protocols like HTTPS.Don't worry about the academic definition of curl, if it is the first time you are reading about it.
Simply put, Postman App is the replacement for whatever 'curl -X' would do
In the context of using Postman and/or API Testing in the QA role, we need to know about this as this would help in requirement gathering, information exchange with Devs, and sometimes for debugging in case of API failures
for now, it is safe to ignore 'curl -X'
b.'GET' -> This is the method type in the curl command and the corresponding step in Postman is achieved by selecting GET Method on the HTTP Request window as shown below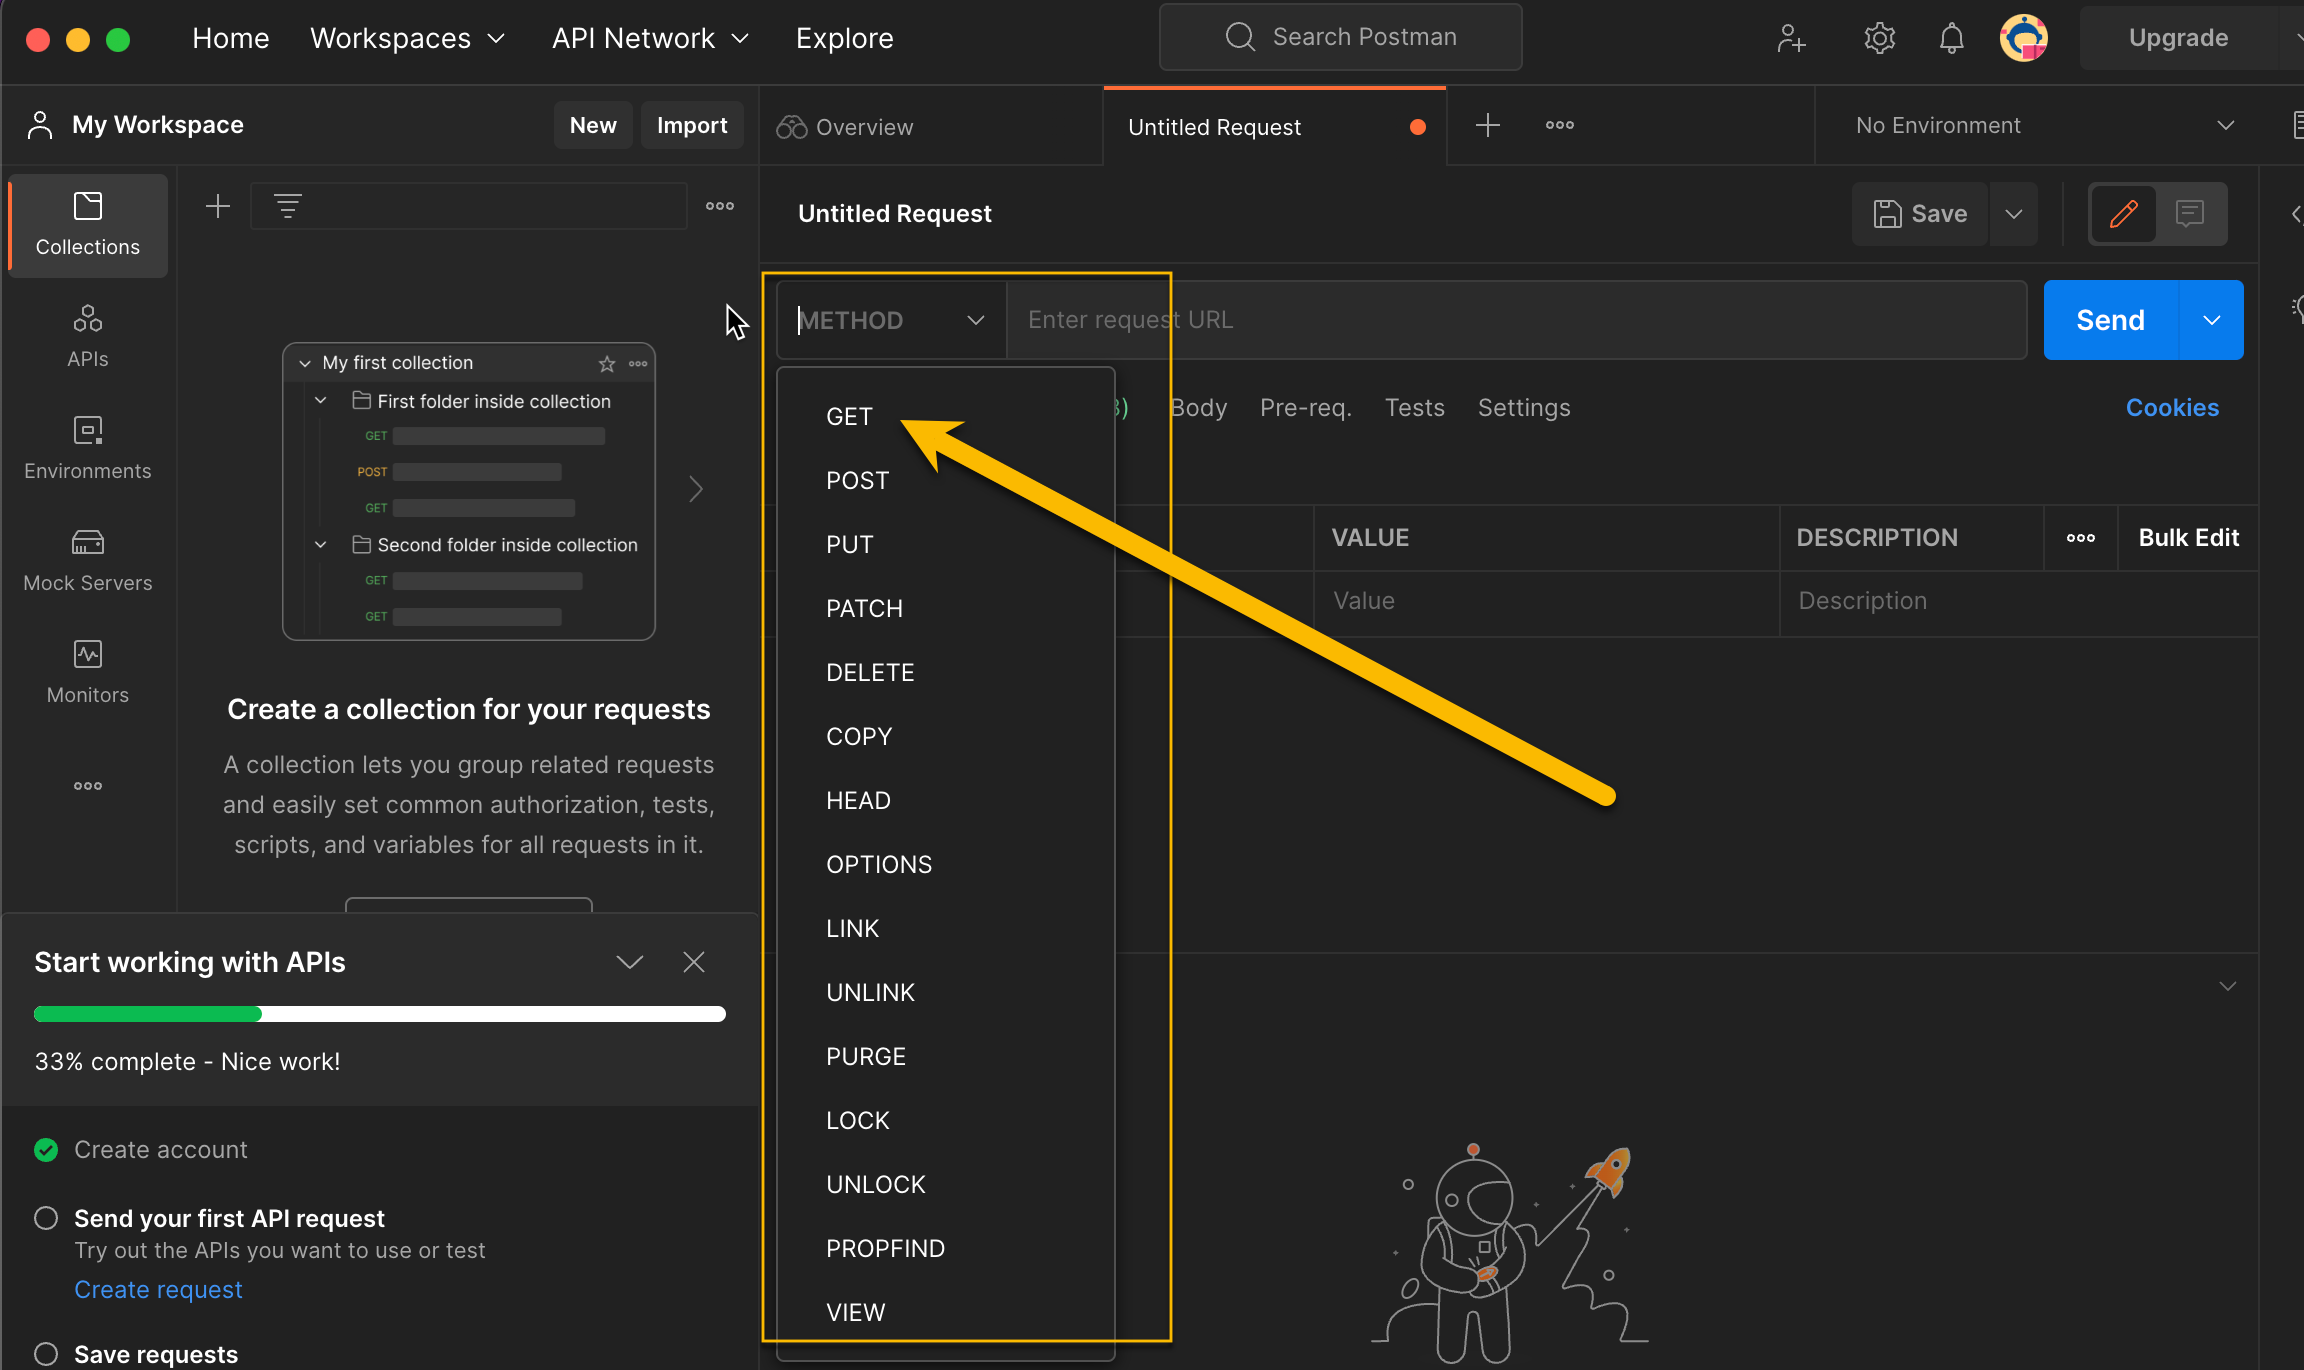
Note: Refer to
Step 1.3 , section a.2if you are unsure of how to get to the HTTP request window, shown belowc.https://petstore.swagger.io/v2/pet/findByStatus -> This is the Request URL from the curl command and in Postman you place it the Request URL as follows: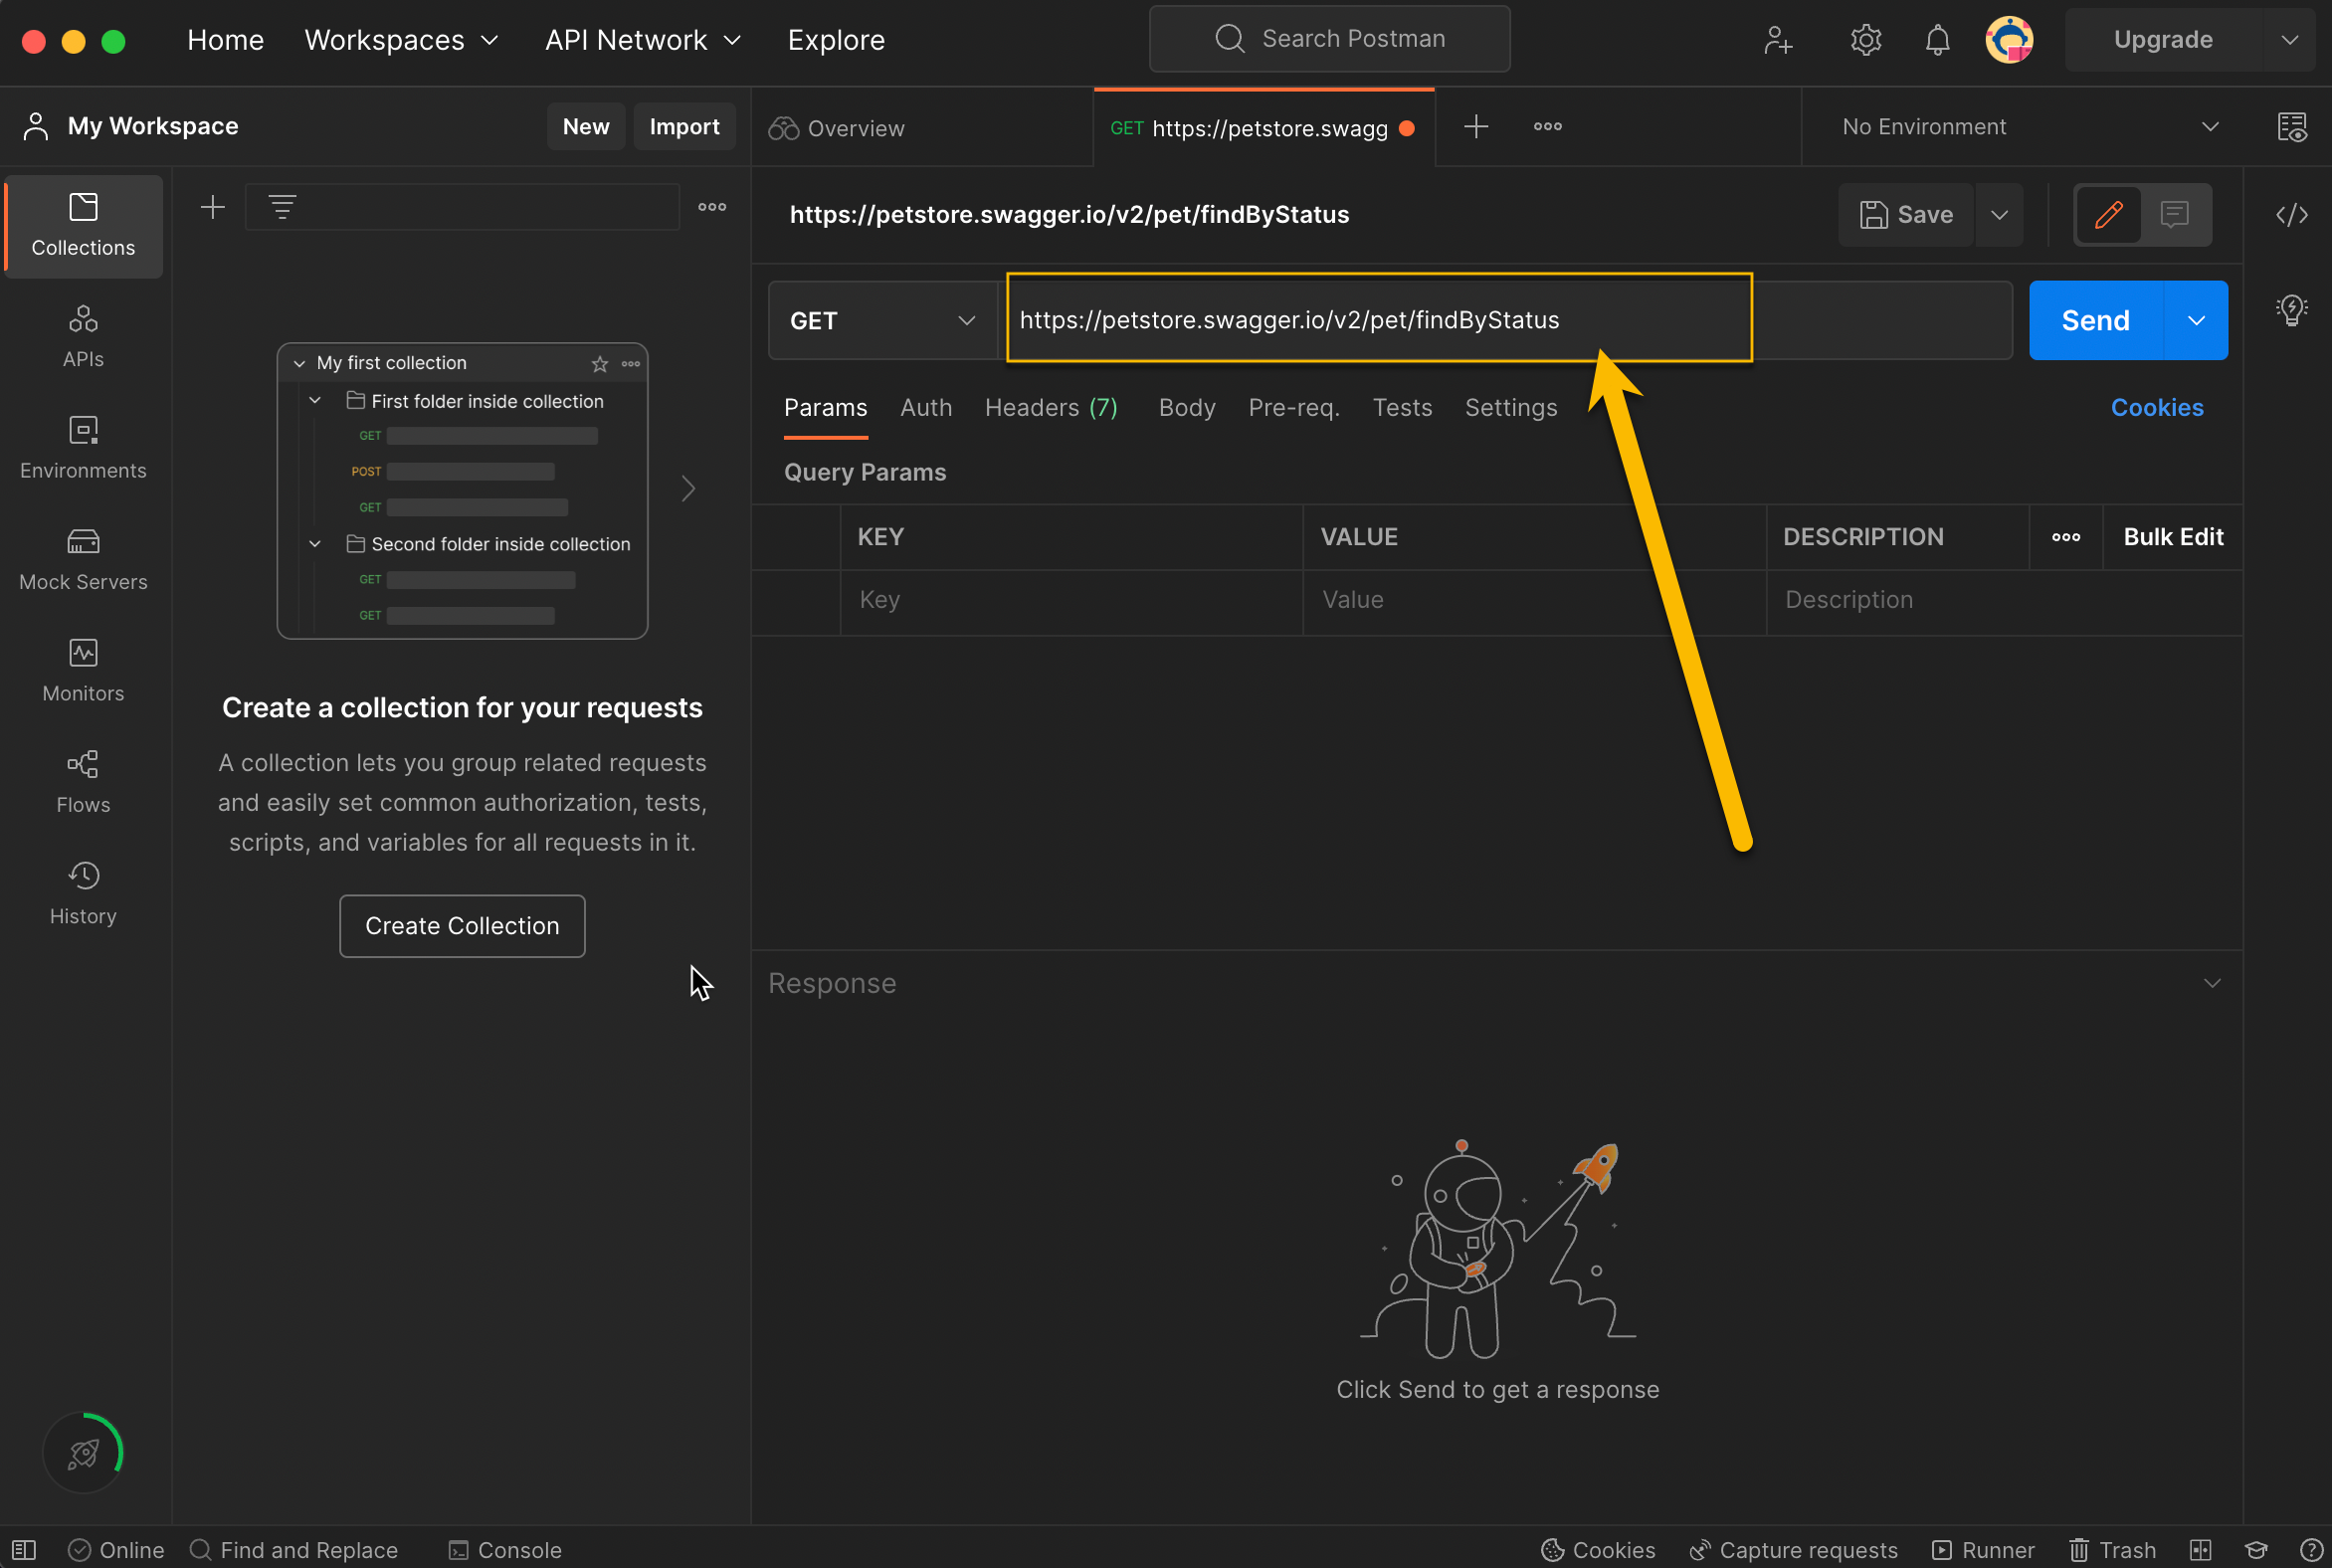
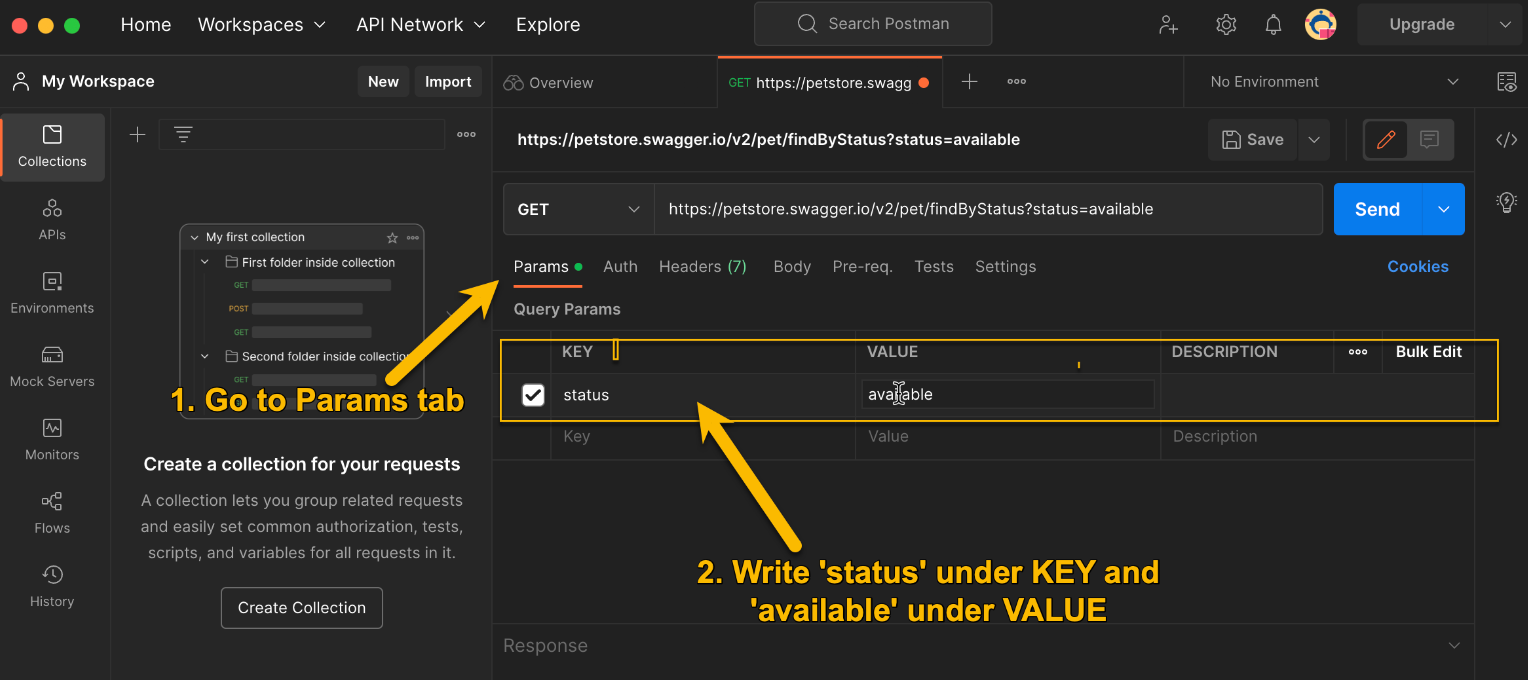
d.?status=available -> Anything that goes with Request URL but starts with ? is known as request parameters.Charateristics of request paramters:
request parameter is written in key-value pairs separated by =
In this case "status=available",
statusis the KEY andavailableis the VALUE
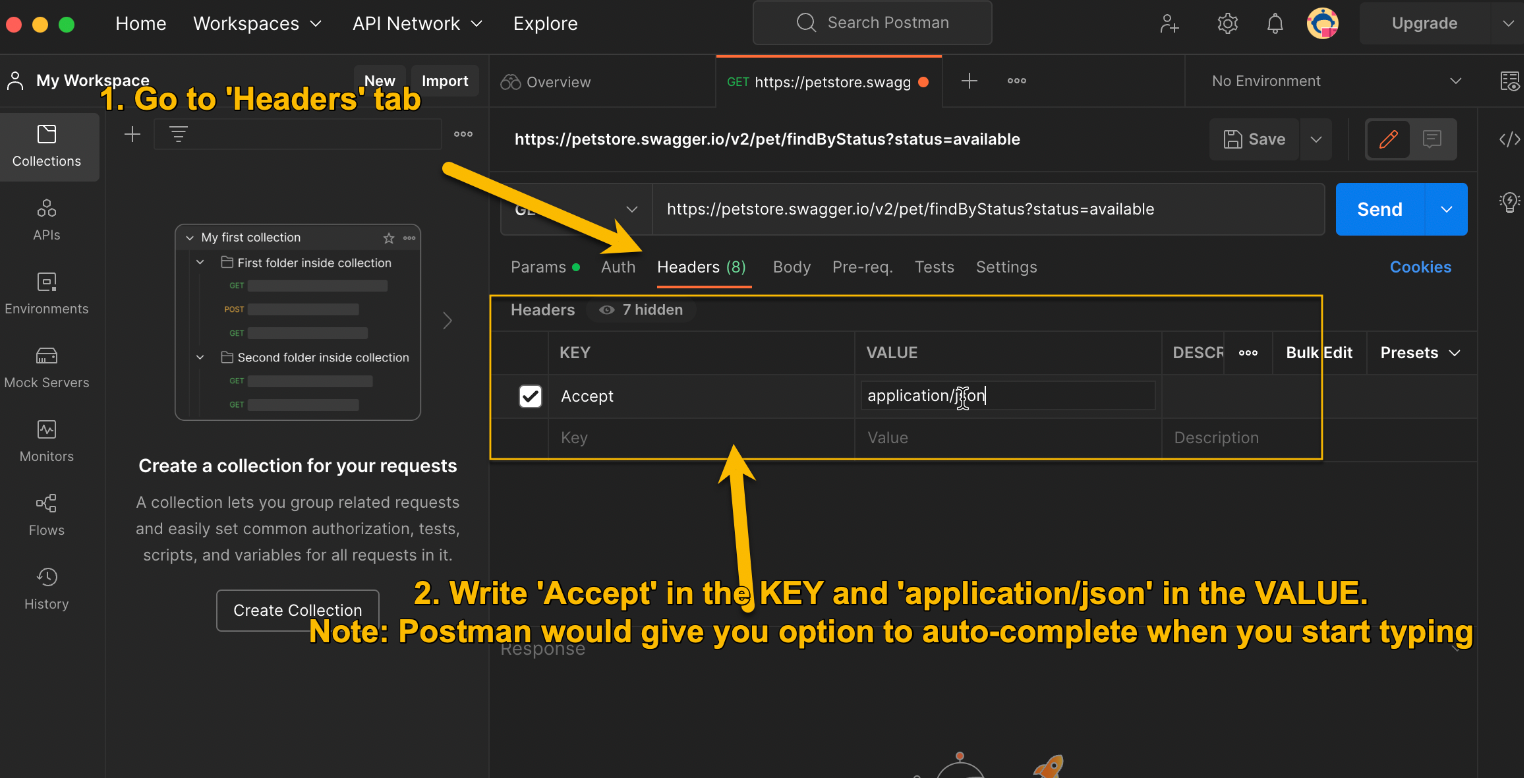
e.-H 'accept: application/json' -> -H in curl represents headers in the HTTP request.Characteristics of header parameters:
header parameter is written in key-value pairs and separated by :
In this example, "accept: application/json",
acceptis the KEY andapplication/jsonis the VALUE
Step 1.4 Make your first GET Call via Postman App
As discussed in the Step 1.3, Section b, now that we got a decent grasp of how we can map a GET curl command to Postman. It is time to make the GET request via postman and check the response
To reiterate, the requirement is as follows:
Requirement: Make the following GET call via Postman
curl -X 'GET' \
  'https://petstore.swagger.io/v2/pet/findByStatus?status=available' \
  -H 'accept: application/json'
1.4.1 Postman - Preparing Request
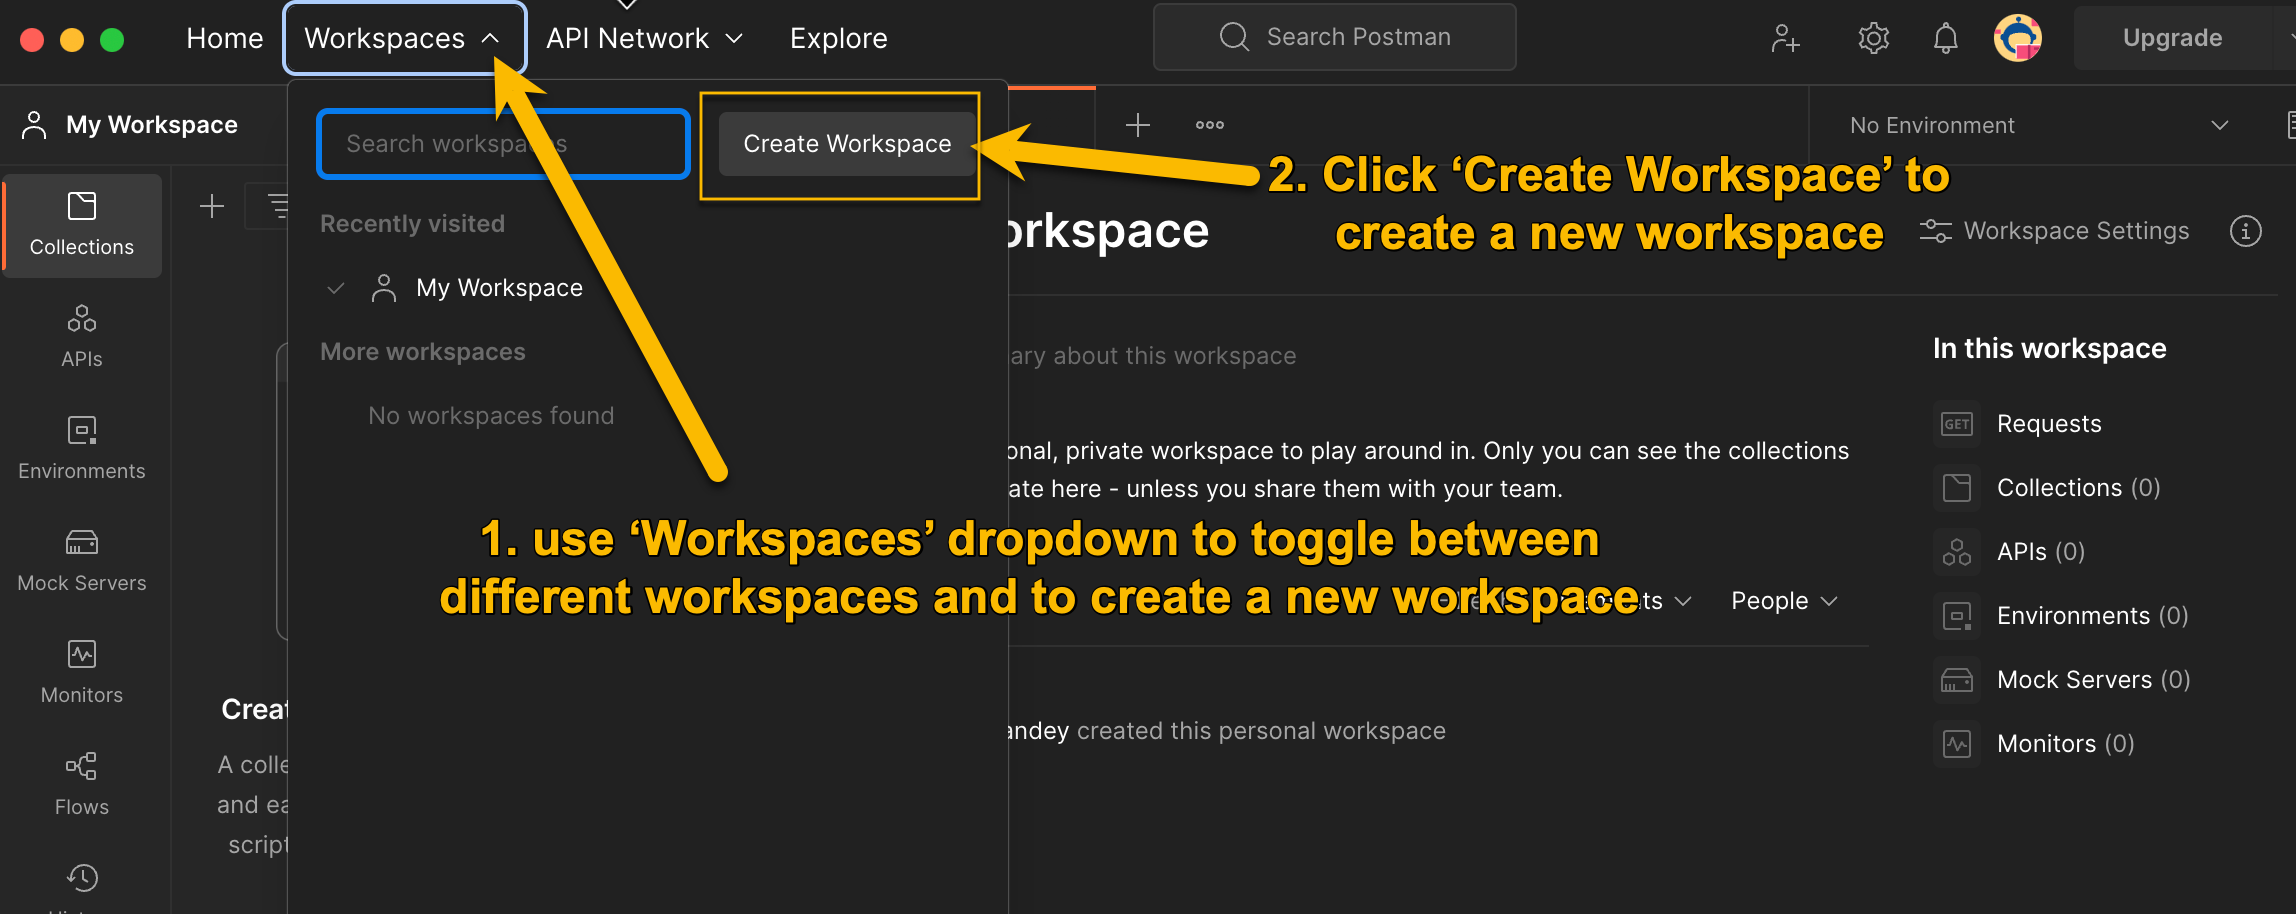
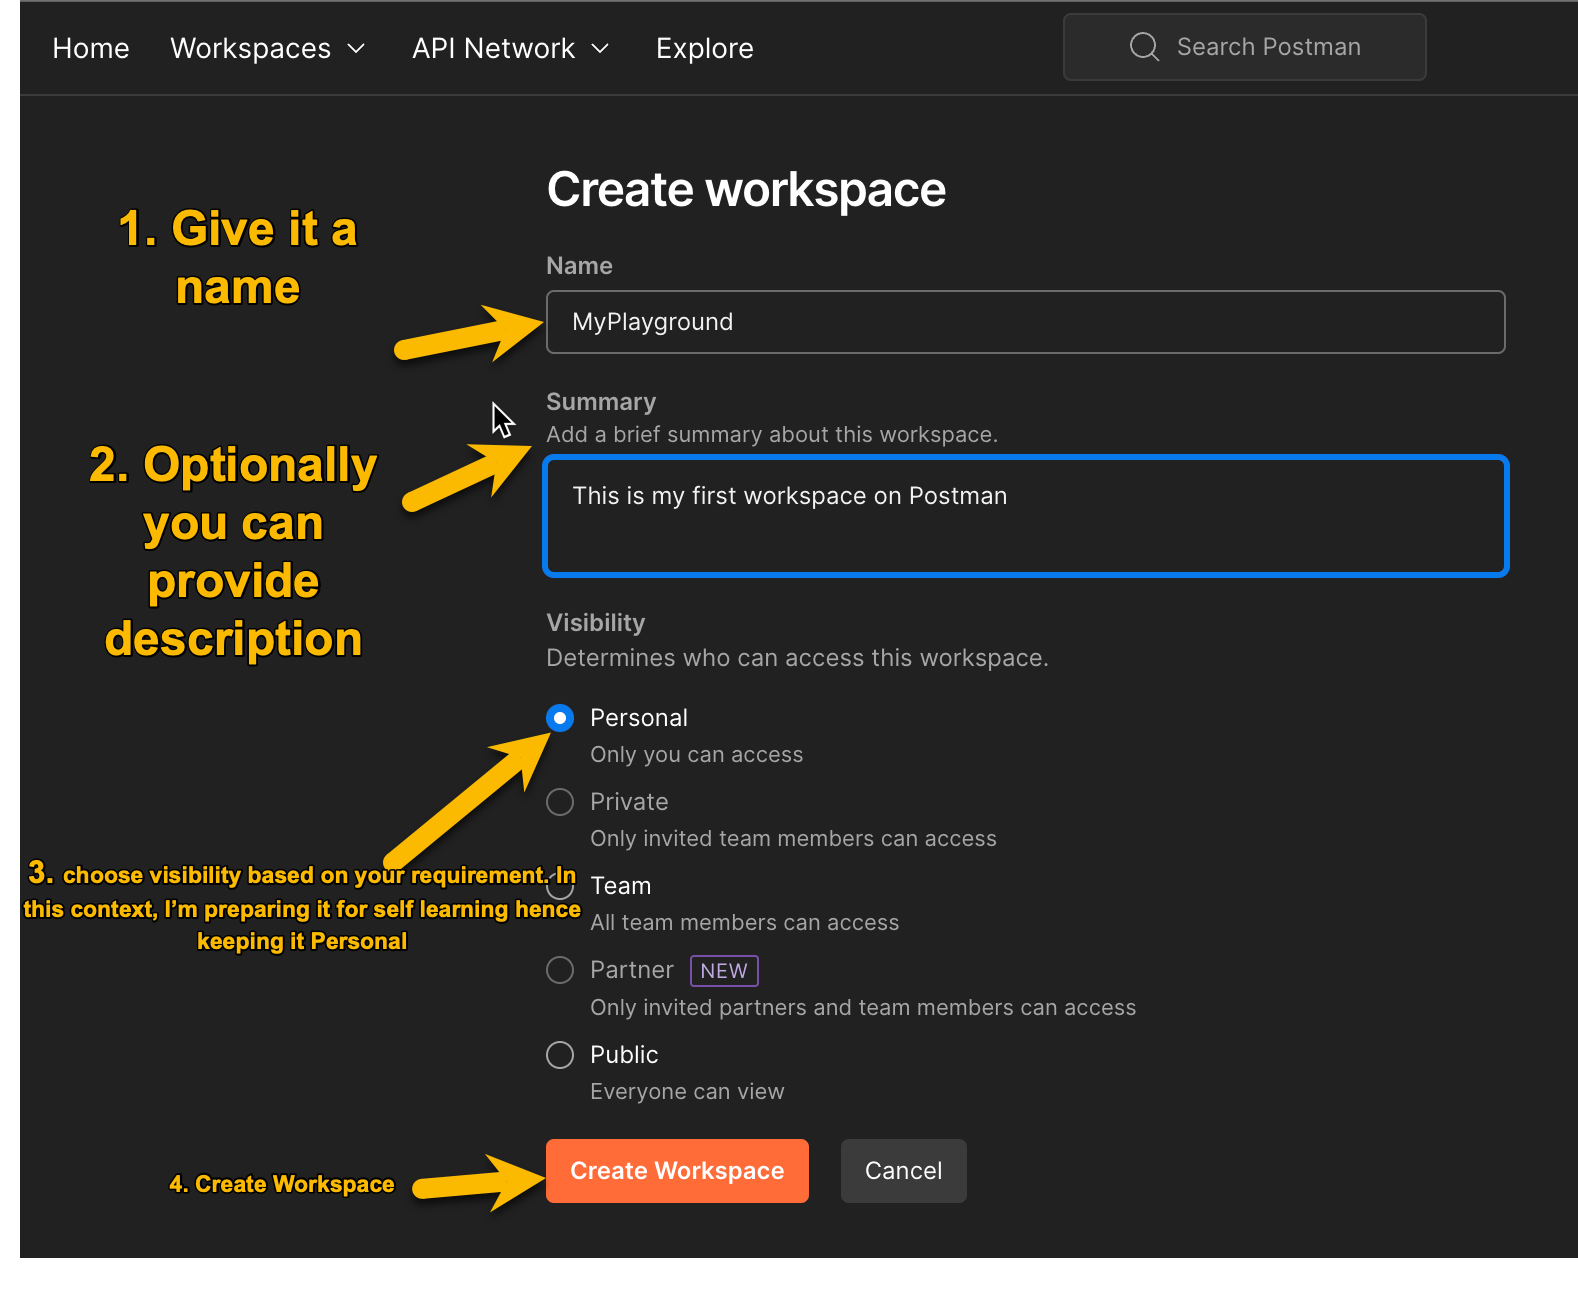
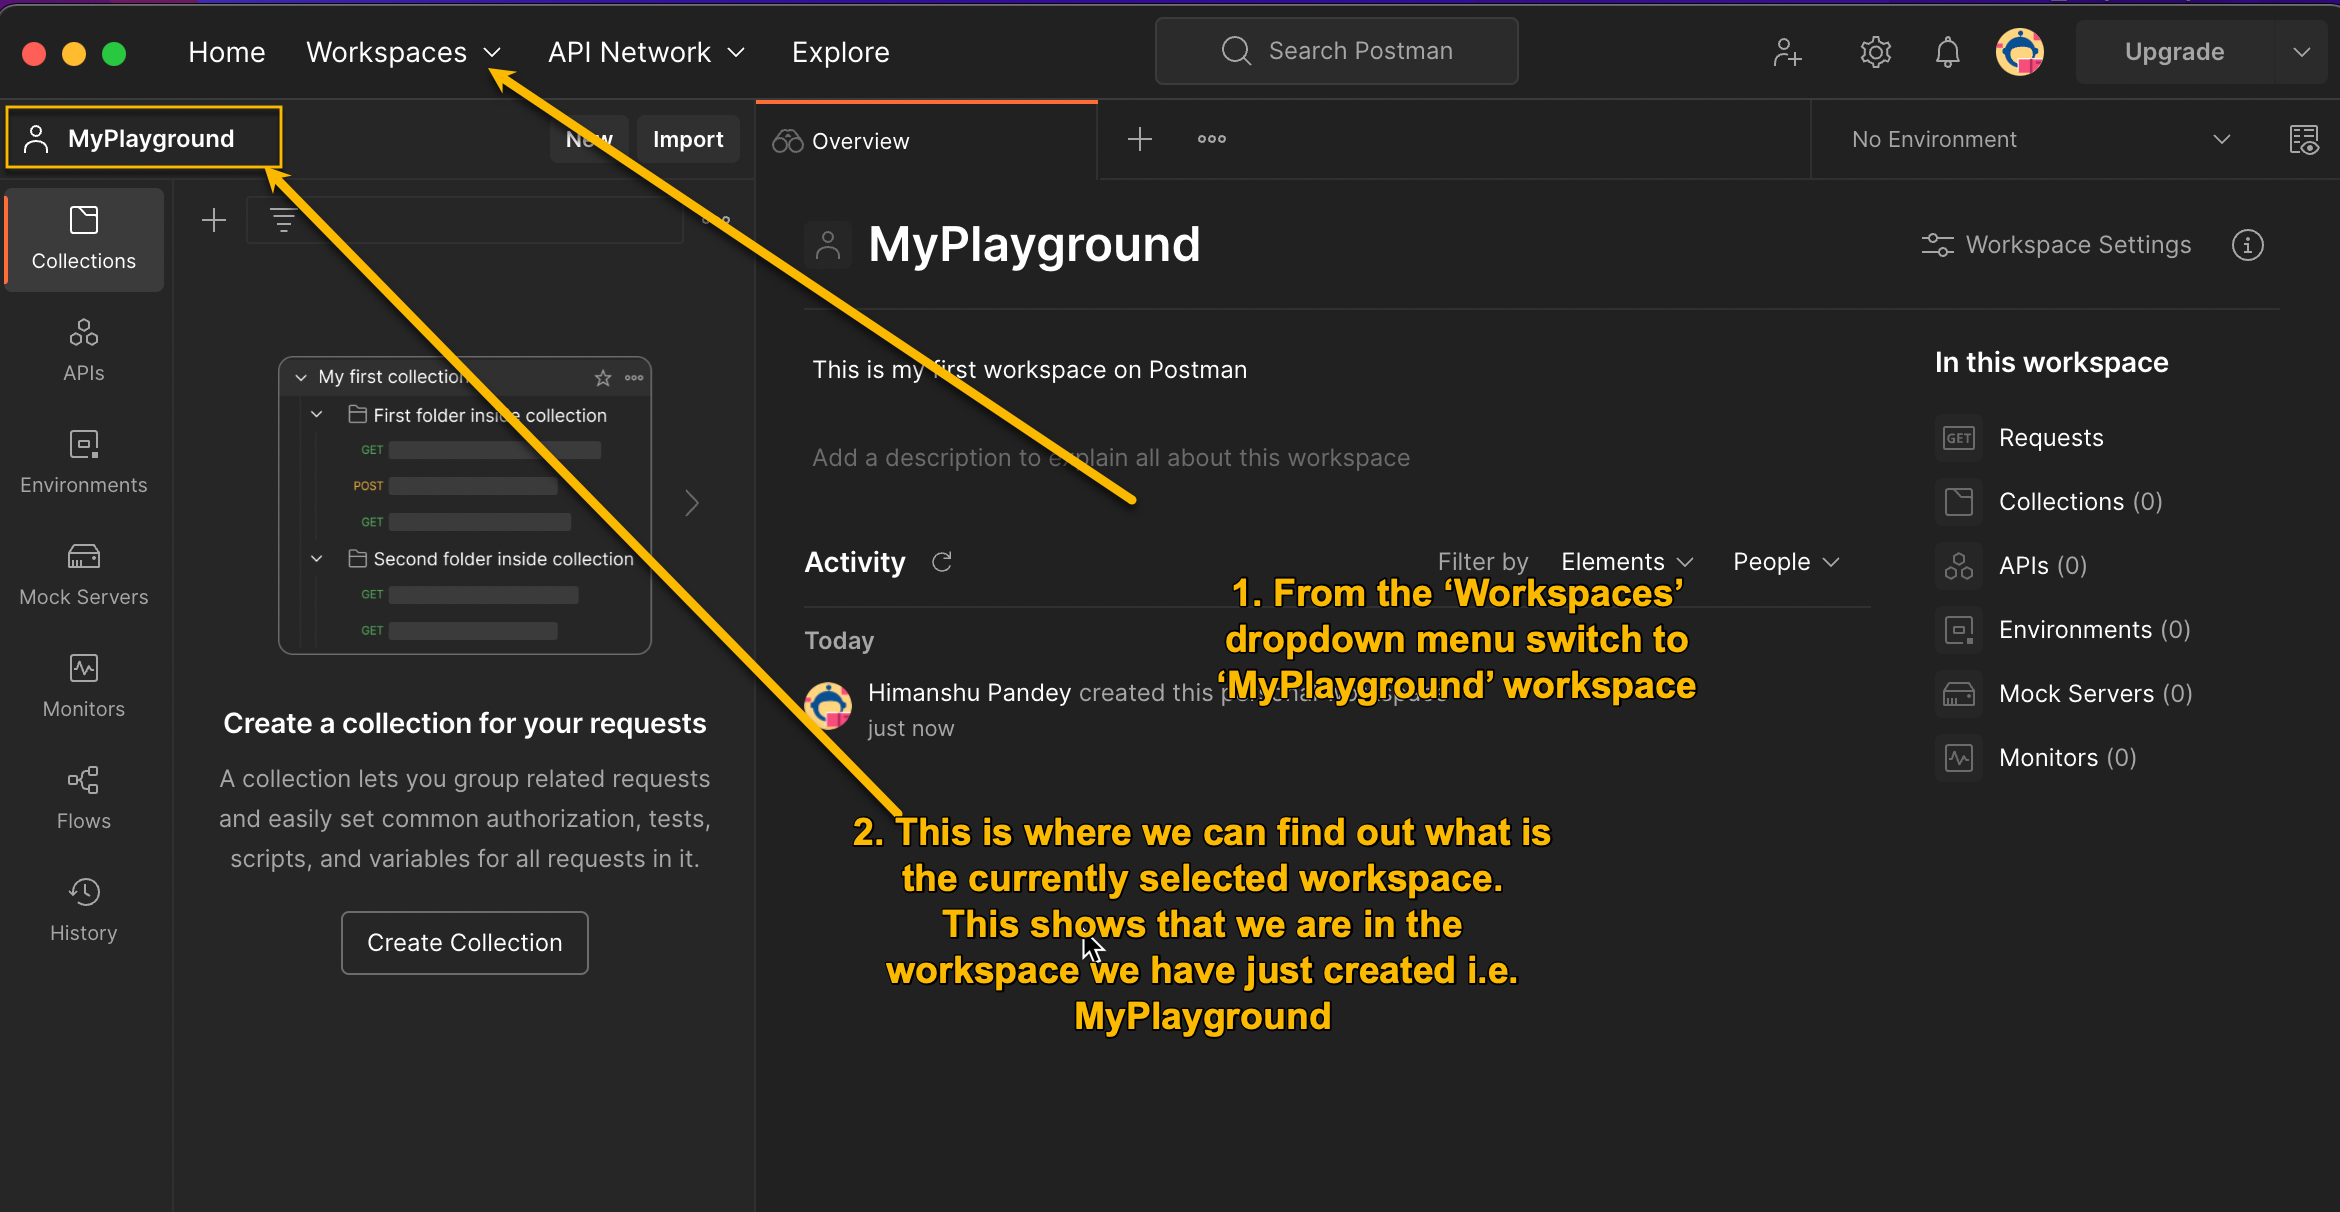
(a) create a New workspace and name it 'MyPlayground'
Every new HTTP request you are going to create is by default going to get added to 'My Workspace'. Instead, create a new workspace
[a.1] from the 'Workspaces' dropdown do the following:
[a.2] name your workspace
[a.3] switch to your newly created workspace:
(b) Under workspace 'MyPlayground' Create a new Collection and name it 'PetsCollection'
[b.1] Go to 'Create New' menu as follows
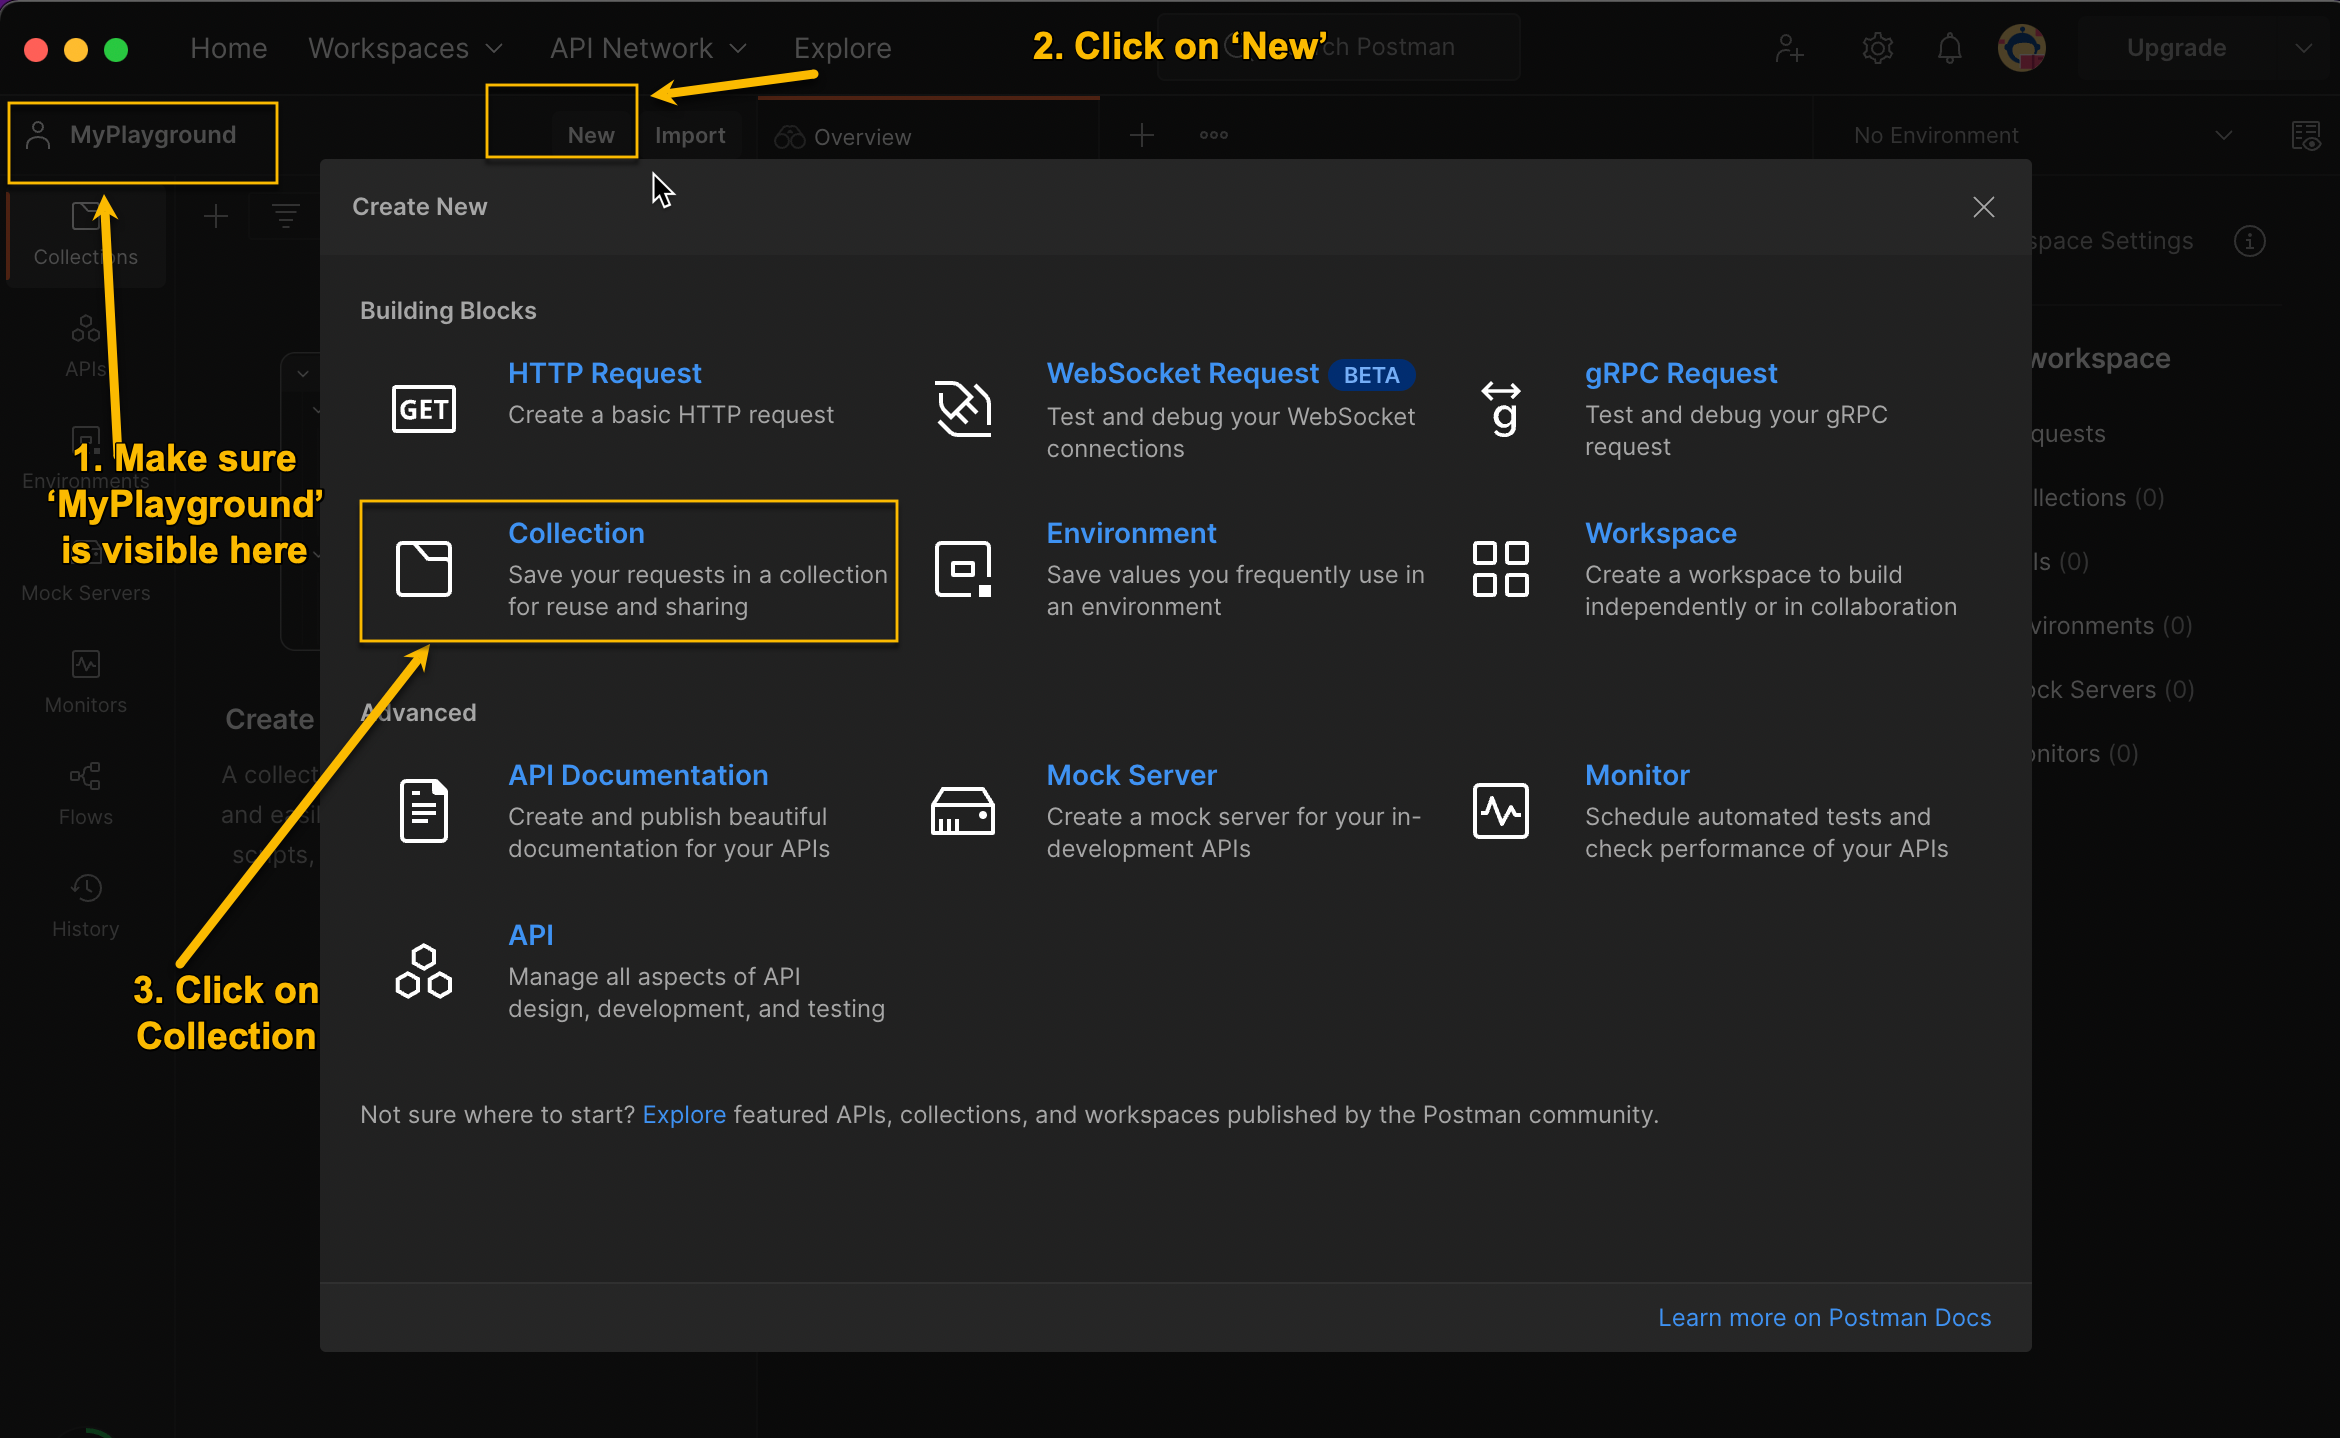
[b.2] Choose a collection name of your choice

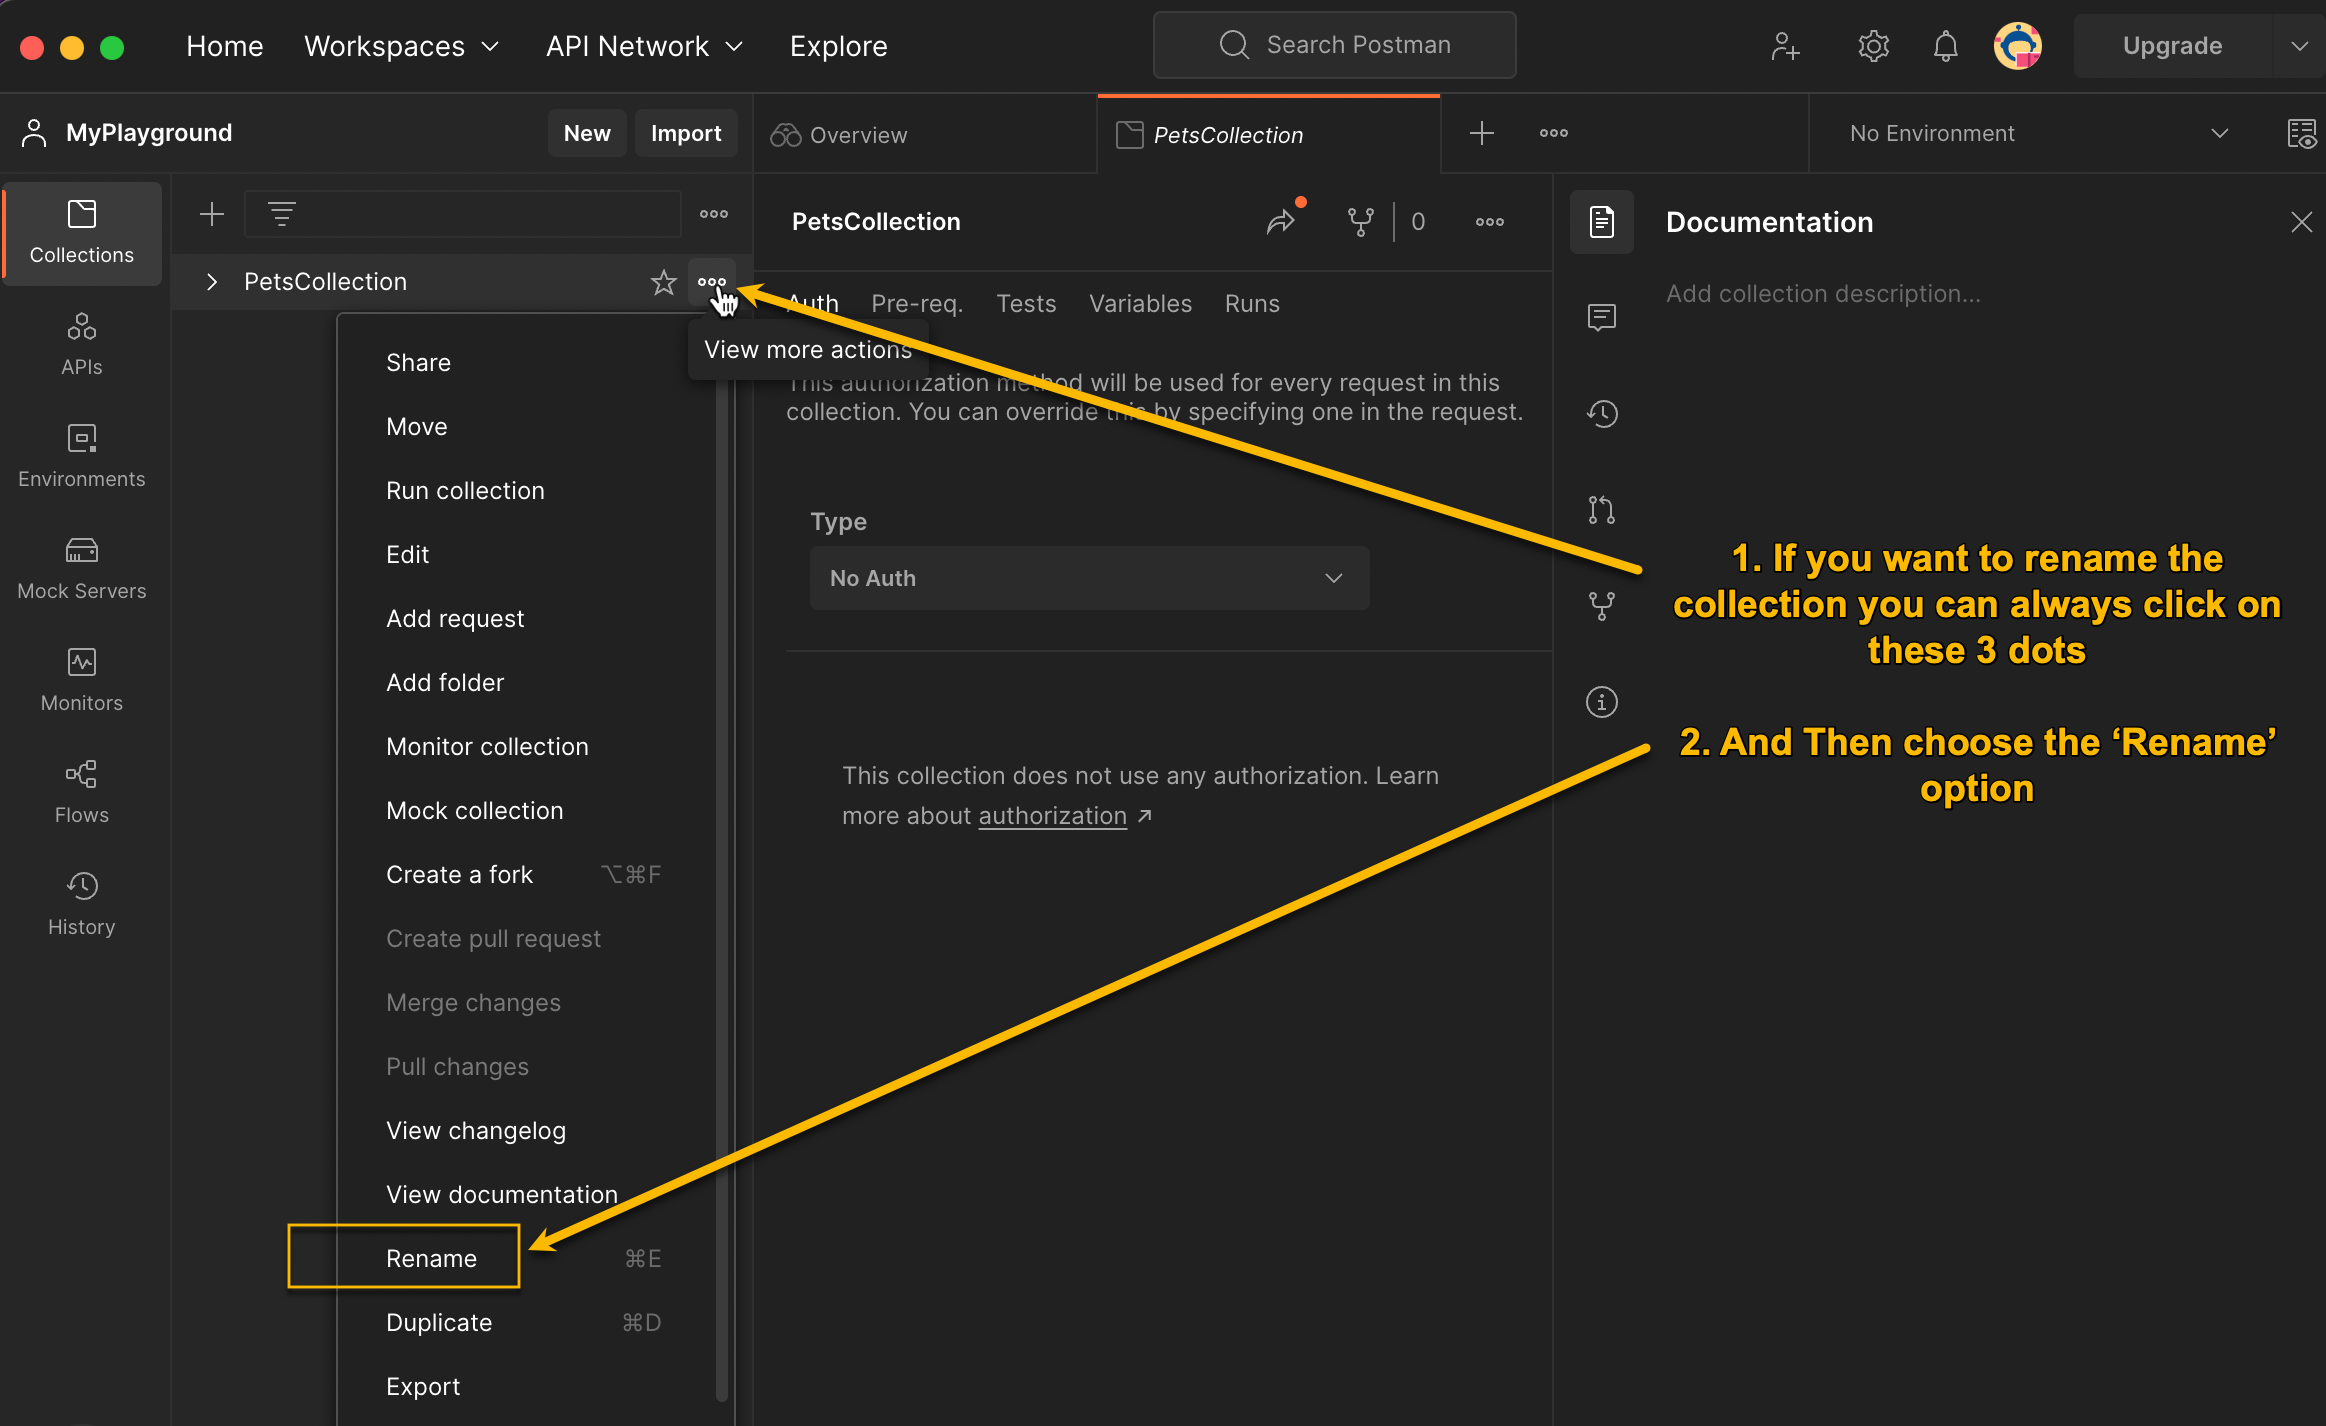
[b.3] remaming collection
(c) Save the following HTTP request as 'findByStatus' under 'PetsCollection'
curl -X 'GET' \
  'https://petstore.swagger.io/v2/pet/findByStatus?status=available' \
  -H 'accept: application/json'
Important : Before going further it is important to understand
Step 1.3, Section b, please go through that section if not already done
[c.1] Add request under the collection

[c.2] Add necessary information in request as follows:

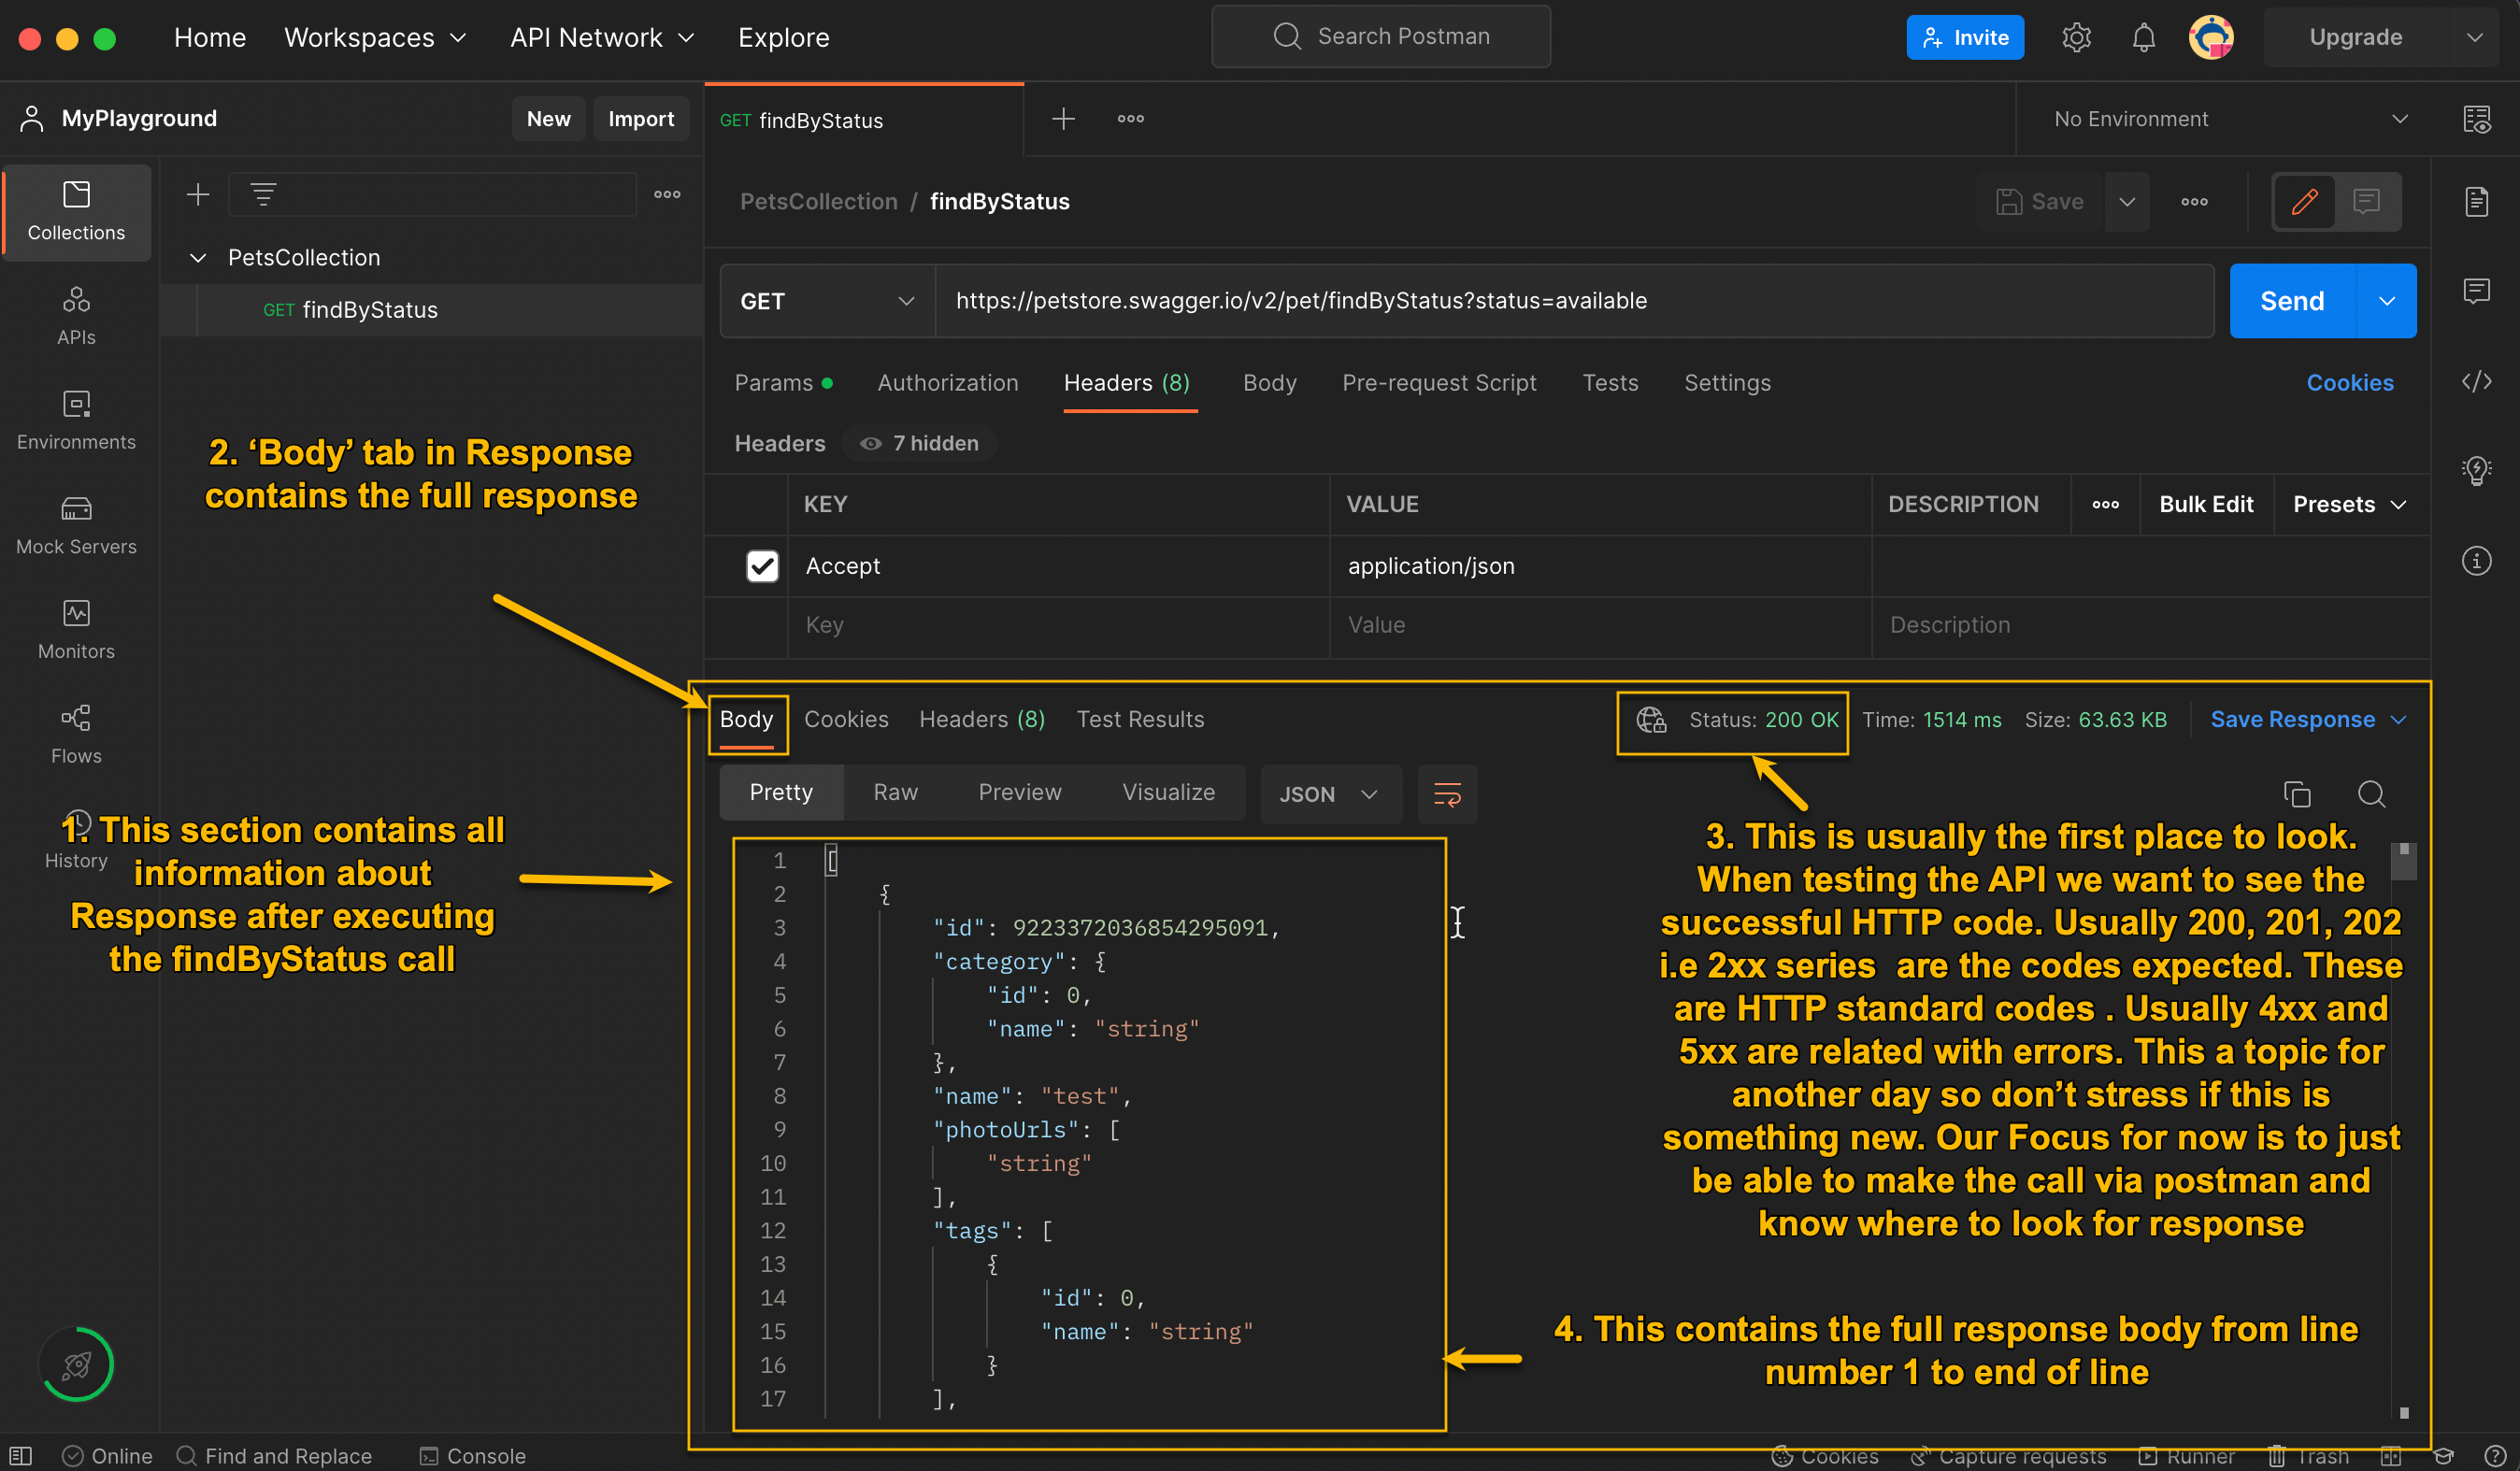
1.4.2 Executing the HTTP GET Request
(a) Execute the request as follows:
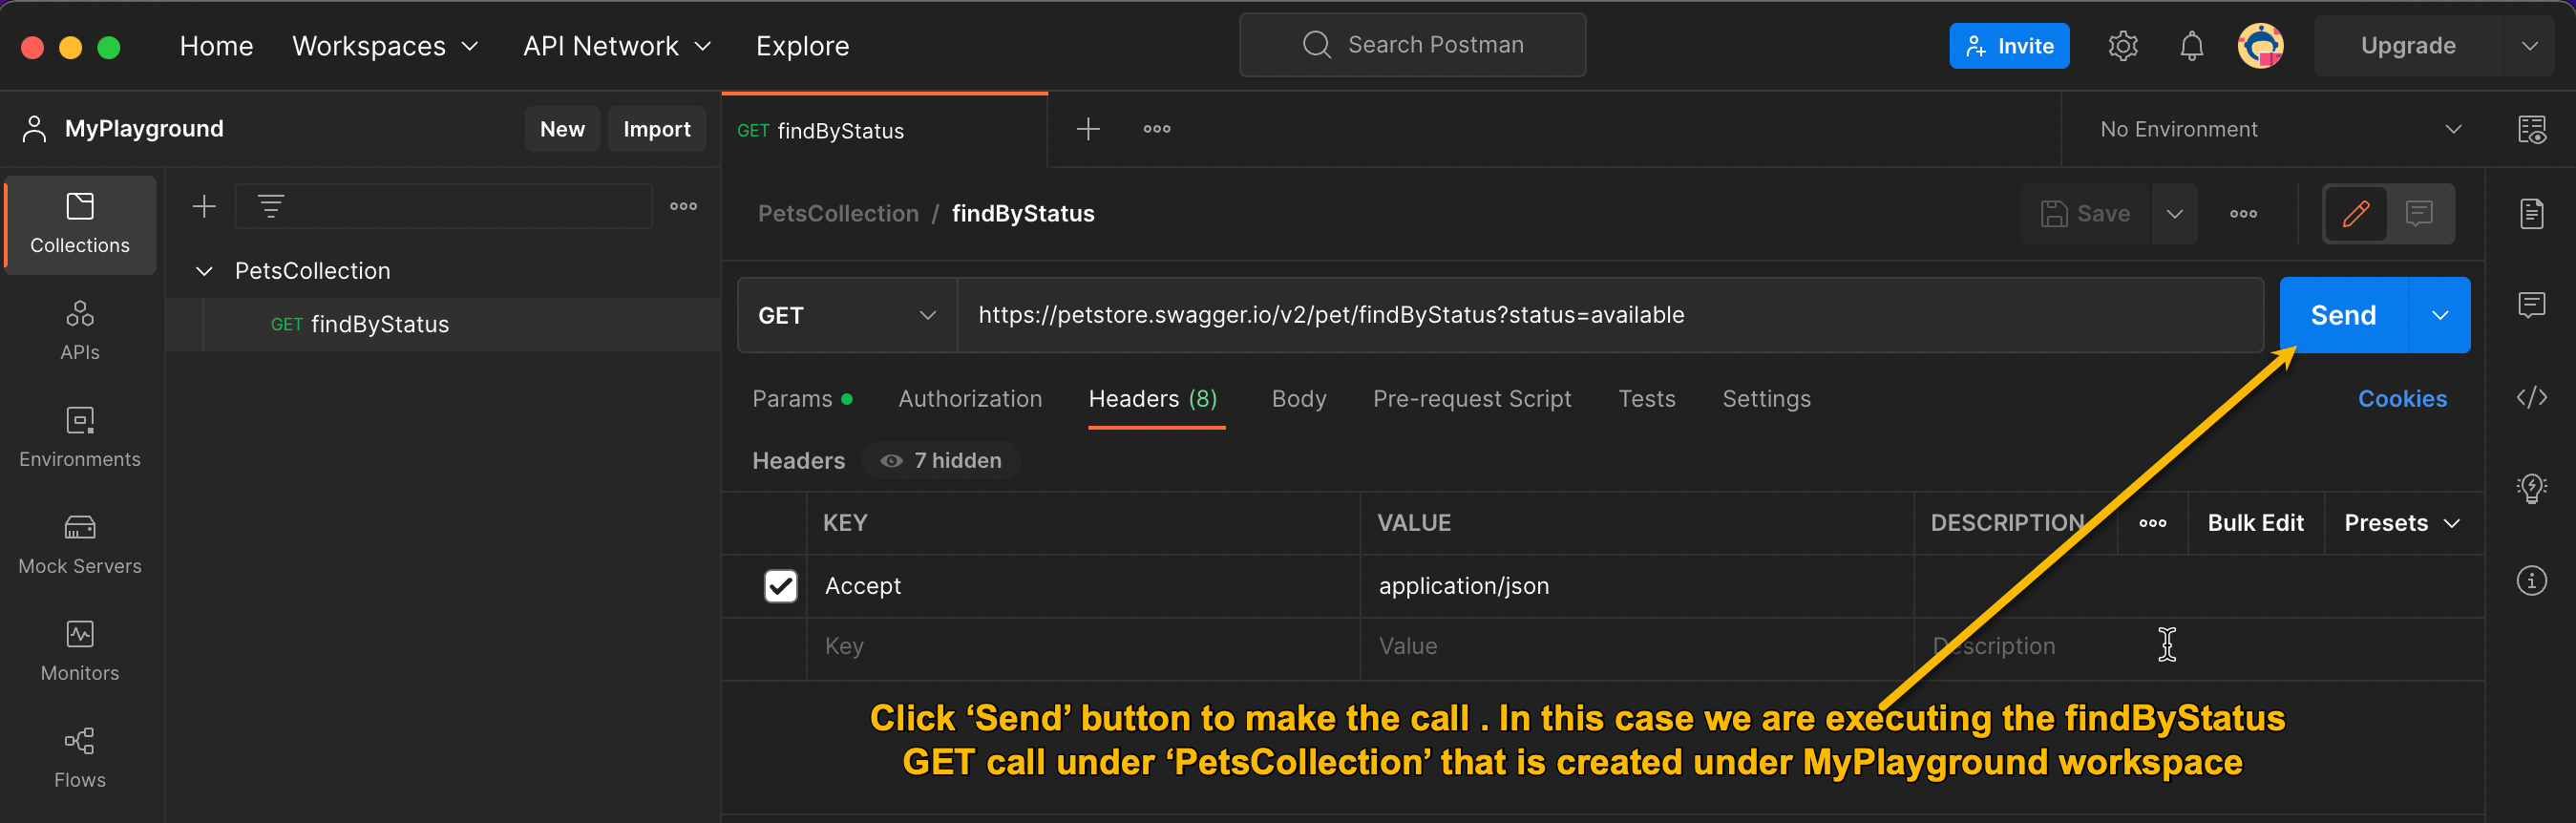
(b) Read the response